|
<< Click to Display Table of Contents >> "Nostalgia" image effect |
  
|
|
<< Click to Display Table of Contents >> "Nostalgia" image effect |
|
In this example you will learn how to use the Image editor to give the image a nostalgic effect. Ultimate Stages
 Edit image 1 Open image in Image editorYou have several options to open the image in the Image editor: •click the Brush icon located in the upper right corner of the image in Layout designer •or click on the Brush icon located in the Object settings window •or right-click on the image in the Timeline and choose Edit image |
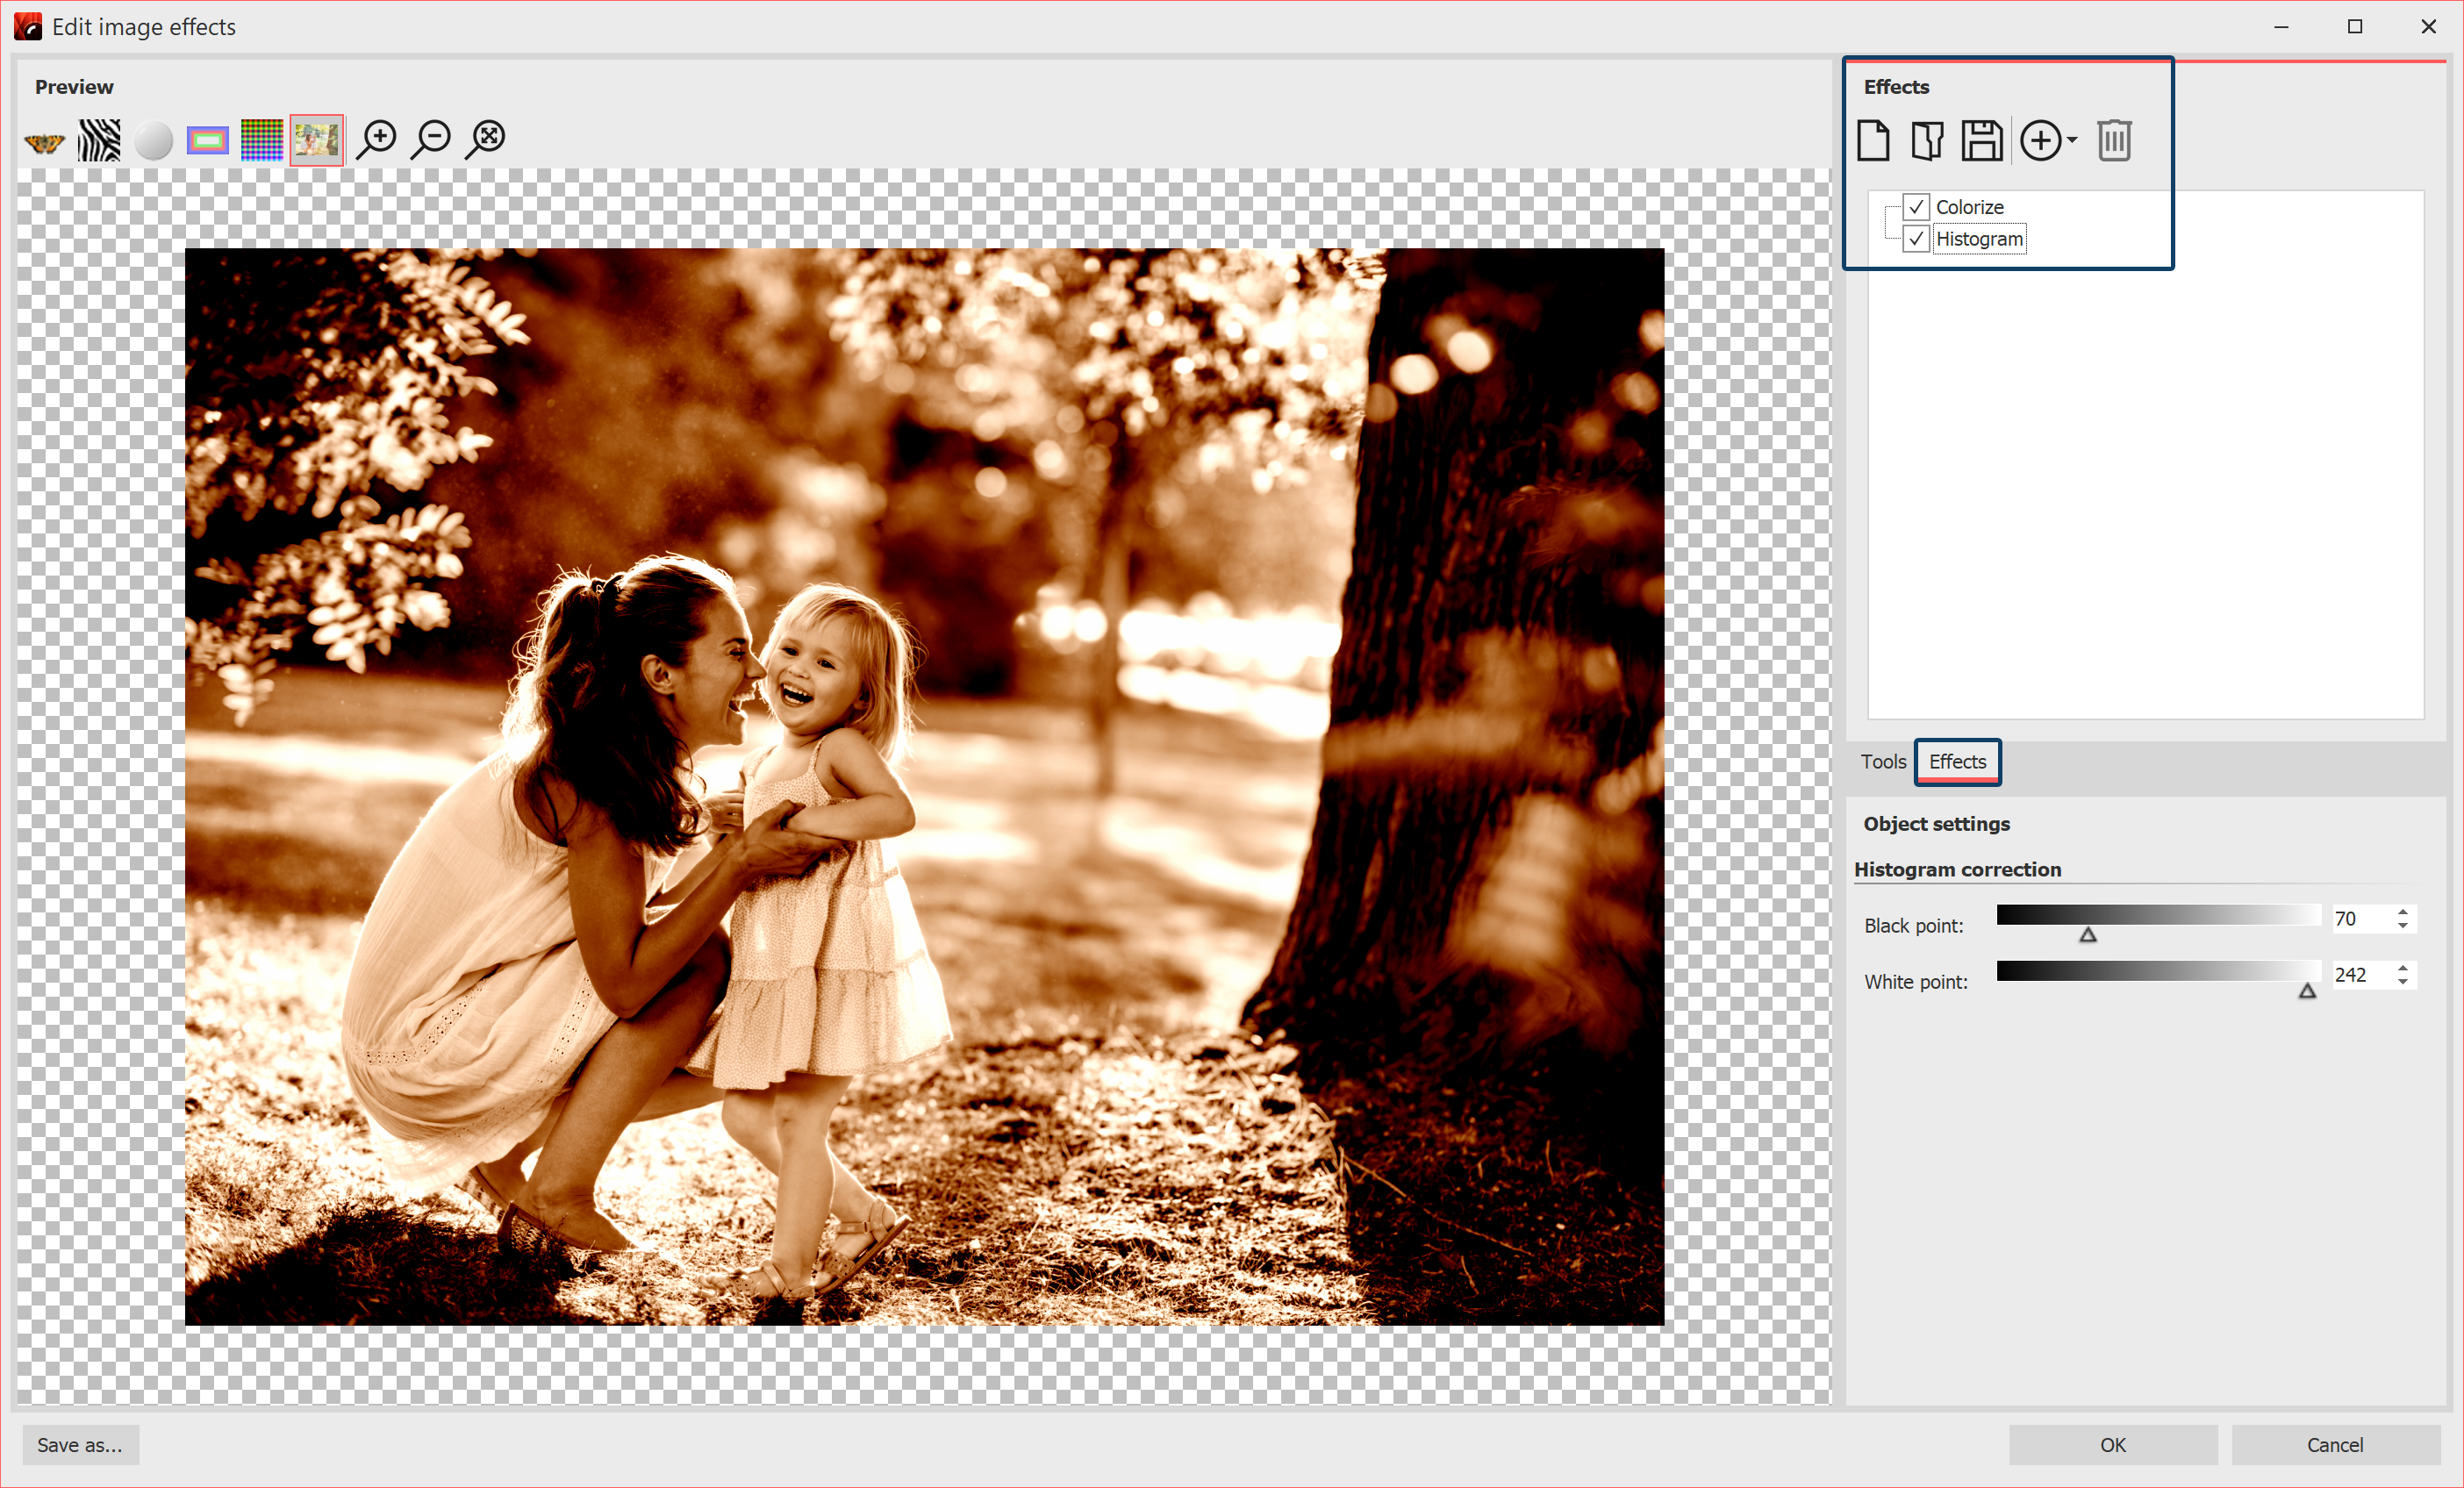
2 Add effects After the Image editor has opened, select the Effects tab. Now add the Colorize and Histogram effects via the Plus icon. Activate the Colorize option under Colorize and set a suitable color under Color. Under Histogram, change the black point and the white point. |
3 Save as image effect Save image effect You can save the image effect you have just created for future use. To do this, click on the Save icon and enter a name for the image effect. It will then appear in the Toolbox under Image effects / Custom image effects. |
, right with image effect")
Left without image effect (original), right with image effect