|
<< Click to Display Table of Contents >> Simple particle effect |
  
|
|
<< Click to Display Table of Contents >> Simple particle effect |
  
|
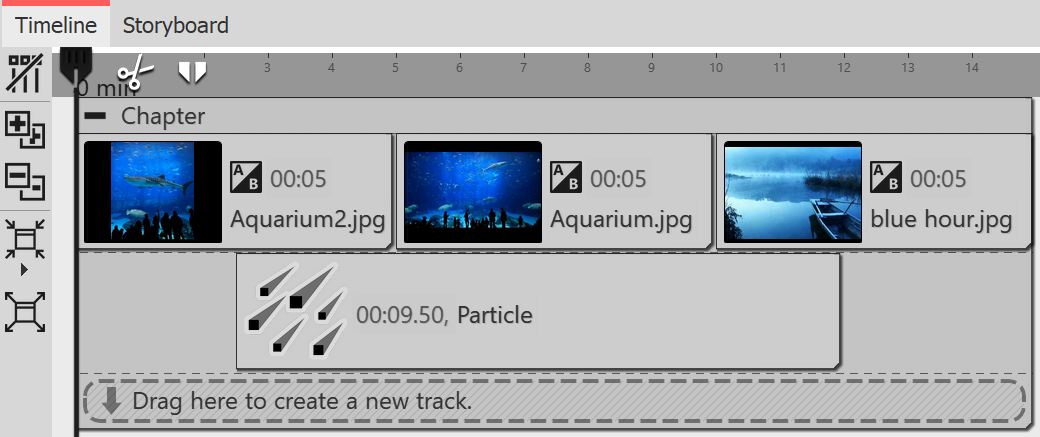
 Insert particle object in new track 1 Insert particle and select file First insert a Chapter object, and then insert your images or videos into it. You want the Particle object to be on top of the content. Therefore, drag the Particle object to the track below your images. After you place the Particle object, you'll be prompted to select a file. Here, select an image that will work well as a particle. Make sure it is a PNG graphic with a transparent background. After selecting the graphic, you can set the duration of the Particle object. |
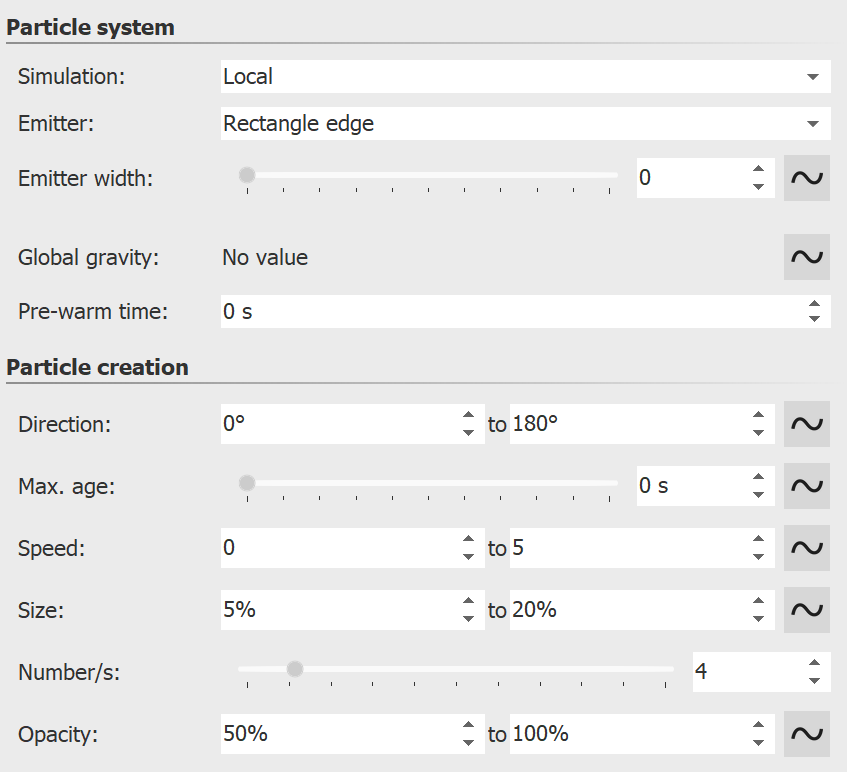
 First settings for particle object 2 Particle object settings In the Settings area, there are many options for the Particle object, which in various combinations can produce the most diverse effects. In this example, we will restrict ourselves to the simplest settings for the time being. If you click on the Curve icon next to the input for the values, you can select the Value range option. Select this option in the Direction, Speed, Size and Opacity settings. Then set the values you see in the image on the left. In the Layout Designer, you'll immediately see the effects of your settings. Change the values so that it suits your desired effect. |