|
<< Click to Display Table of Contents >> Zooming out |
  
|
|
<< Click to Display Table of Contents >> Zooming out |
  
|
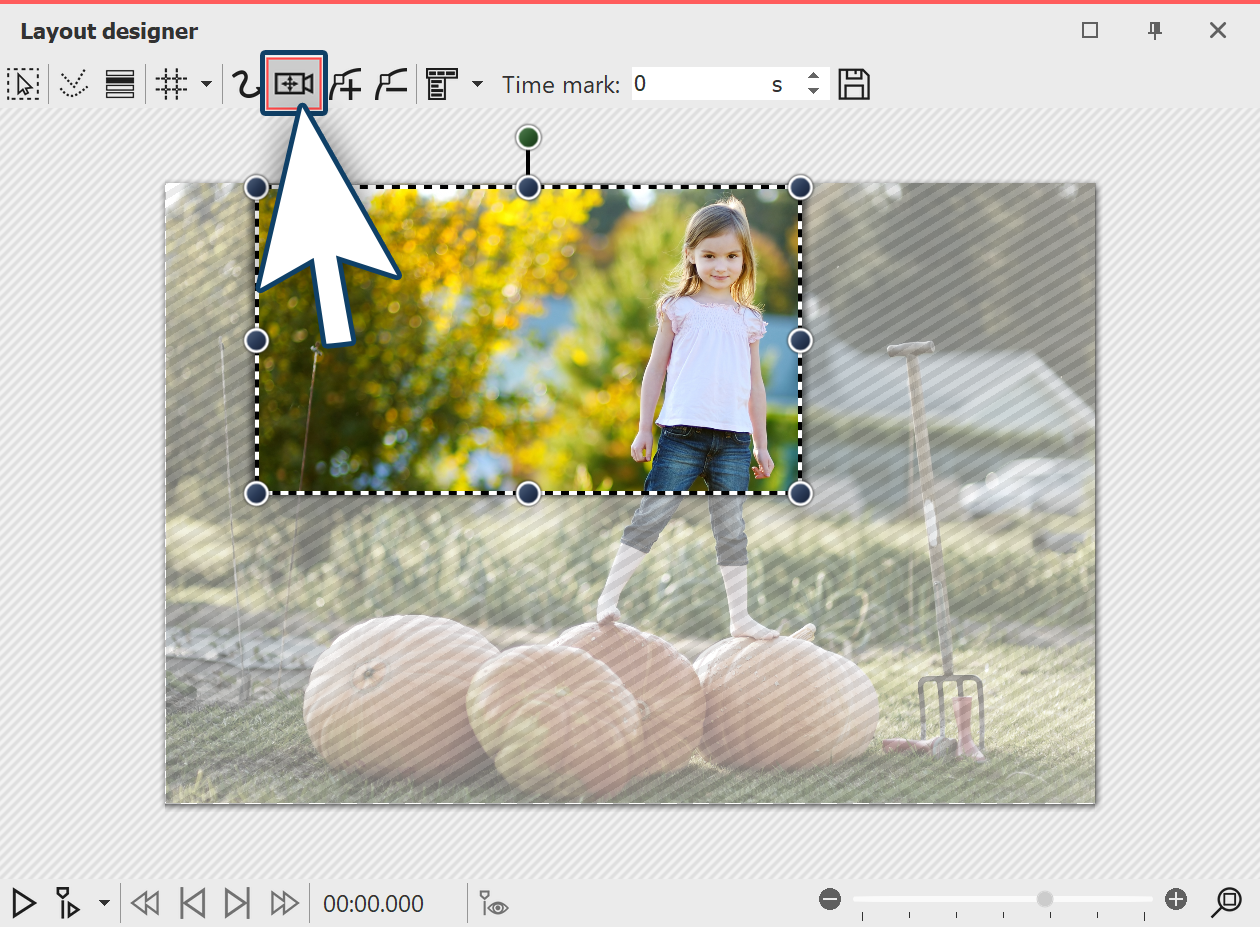
 Activating zoom & camera panning Click the image object in the Image list or Timeline so that the image will be displayed in the Layout designer. Now activate the zoom & camera panning tool , by clicking on the corresponding icon in the top bar of the Layout designer. If the zoom & camera panning tool is active, for a short time the words “camera panning” will appear over the image in the Layout designer. As soon as you have activated the zoom & camera panning you will see a dotted border around the preview image, the positioning frame. Reduce the size of this positioning frame and determine which section of the image is to be shown first. |
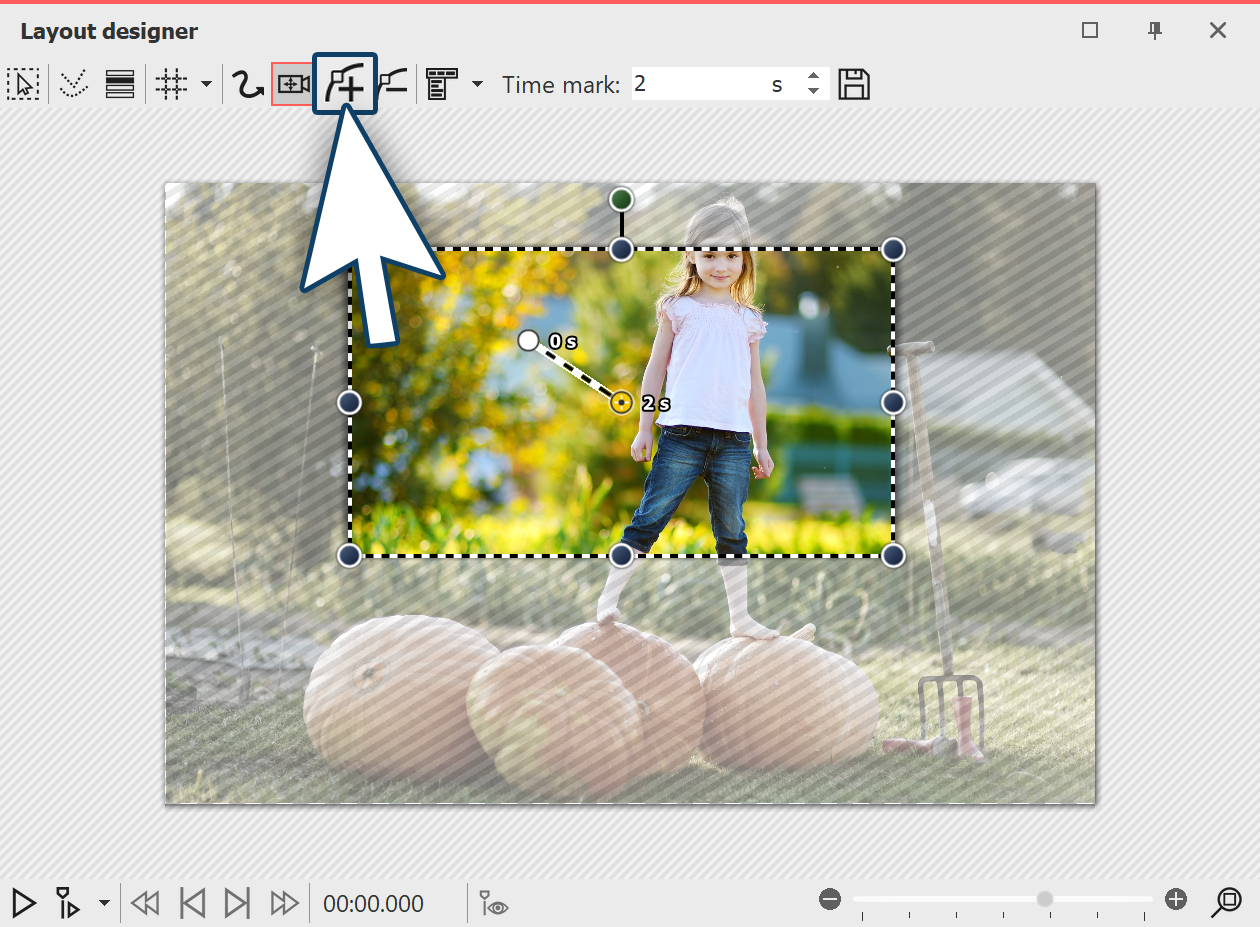
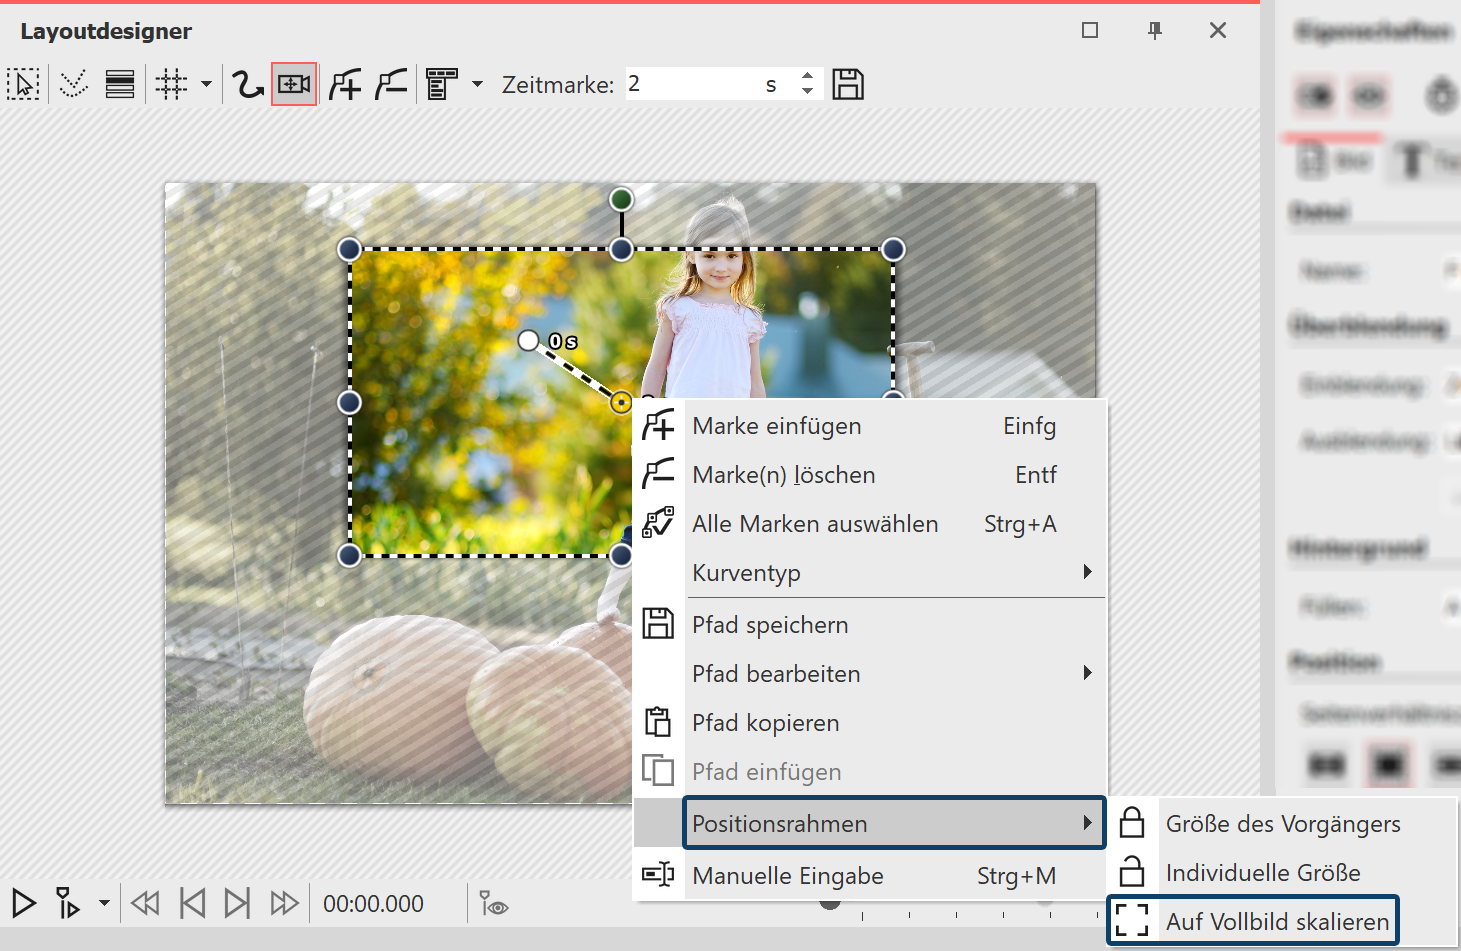
 Inserting motion markers So that the section you have just selected can be zoomed out of, you must now create a new motion marker. Click on the plus icon to insert a motion marker or use the insert key. A new positioning frame will appear. Right click within the frame to call up the context menu. |
 Scaling the positioning frame to full screen Select positioning frame - scale to full screen. This ensures that the positioning frame automatically includes the entire image. |
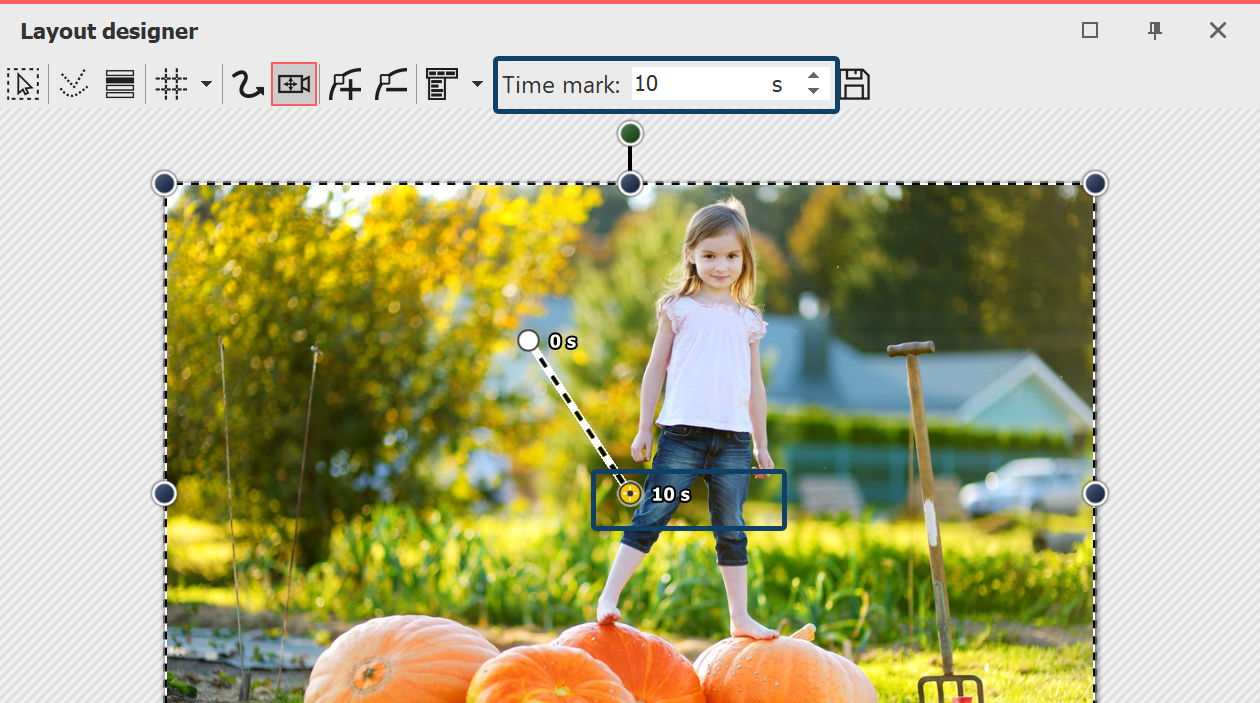
 Extending time So that the camera does not pan too abruptly from one section of the image to the next, you can lengthen the time it takes for the camera panning. To do this select the first marker, so that the middle point, located in the section of the image you are using, appears orange. Under timestamp you can now enter a higher value, such as 10 seconds. |