|
<< Click to Display Table of Contents >> Shadow effect |
  
|
|
<< Click to Display Table of Contents >> Shadow effect |
  
|
 Shadow effect You can find the effect in the Toolbox below the tab objects in the live effects section. With the shadow effect you can add a shadow to texts, images, particles or videos. Its color, angle and distance can be adjusted individually. As a live effect it adapts, as opposed to static shadow of texts and images, to any new animation scenario. |
|
The shadow effect is a so-called screen-based effect, which means that as an input it only has the pixels currently visible on the screen. An image or a text off screen can still cast a shadow, even if the shadow distance projects into the visible range. The shadow distance refers to the longer side of the screen (usually the width). At a 50% distance, the shadow is half the width of the screen away from the shadow-casting object. At 100% a shadow will be no longer visible, because it is one whole screen width removed. |
In order to use this effect, you can drag it directly onto an image in the Timeline. You can also drag the effect into the Timeline and later add one or more images. In this case, drag an image object into the empty yellow box. After you have inserted the image, a yellow frame appears with the title of the effect, which surrounds a small preview in the Timeline. Clicking on the yellow frame, you can specify the settings for the effect in the properties window. 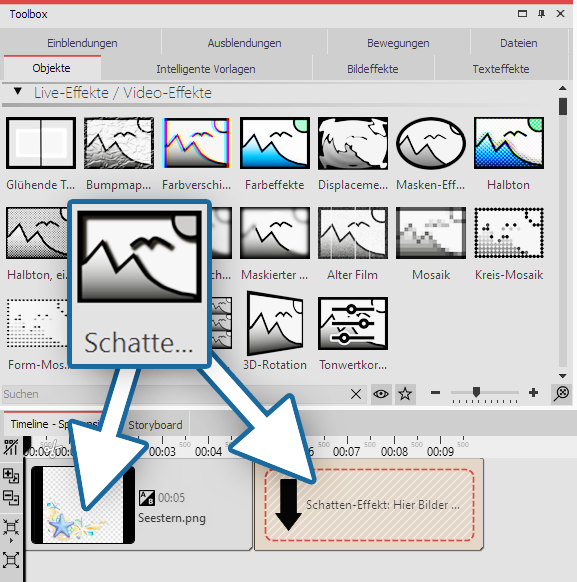 Inserting the shadow effect 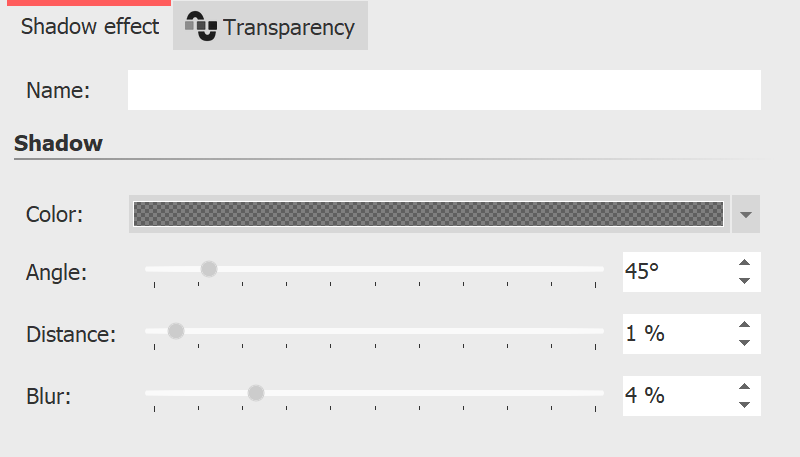 Settings for the shadow effect |
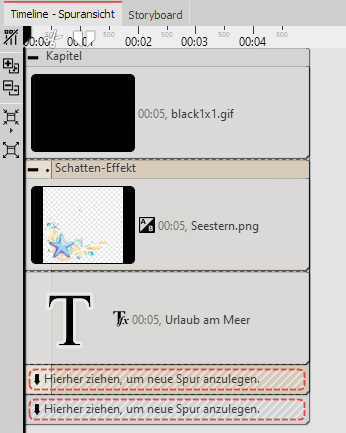 Putting it together in the timeline Open the objects tab in the Toolbox. 1.Drag a chapter object from the Toolbox into the Timeline. 2.In the background field you will find the colored background object. Drag the object into the chapter and select a background color in the properties field, under color fill. 3.Create a second track by dragging a shadow effect underneath the colored background (onto “drag here to create new track”). 4.Into the empty shadow effect, drag a text object and an optional graphic with a transparent background. The objects must be located directly underneath each other in the Timeline for them to be displayed simultaneously. 5.Position the text and the graphics in the Layout designer. 6.Click on the yellow frame of the shadow effect, in order to specify the shadow color, shadow angle and shadow length. |
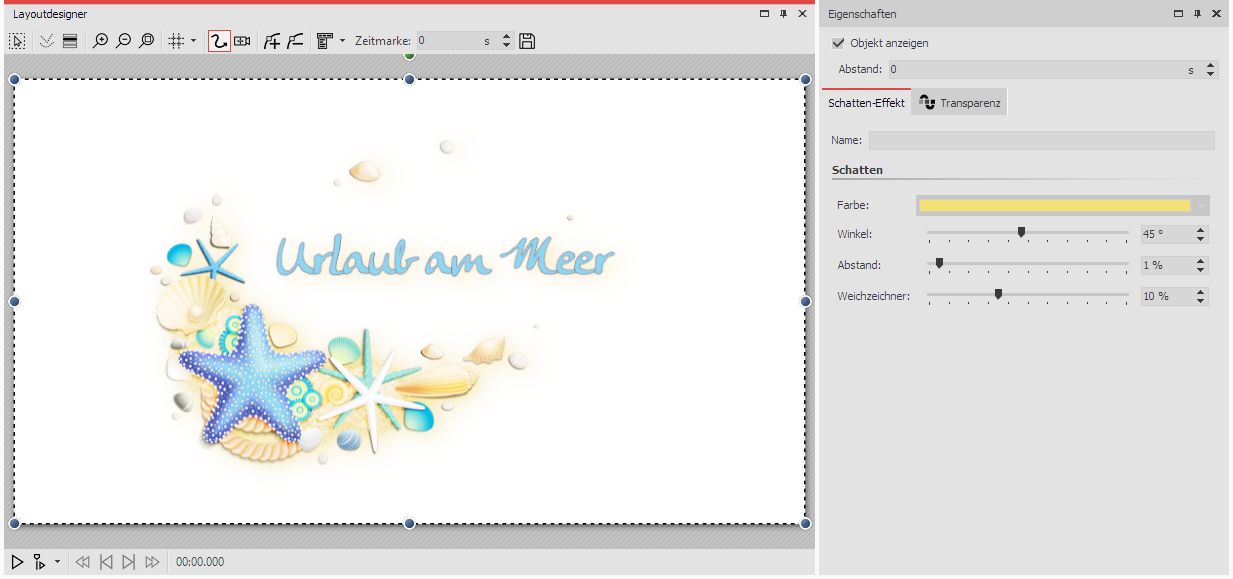
Shadow effect in the layout designer