|
<< Click to Display Table of Contents >> Blur effect |
  
|
|
<< Click to Display Table of Contents >> Blur effect |
  
|
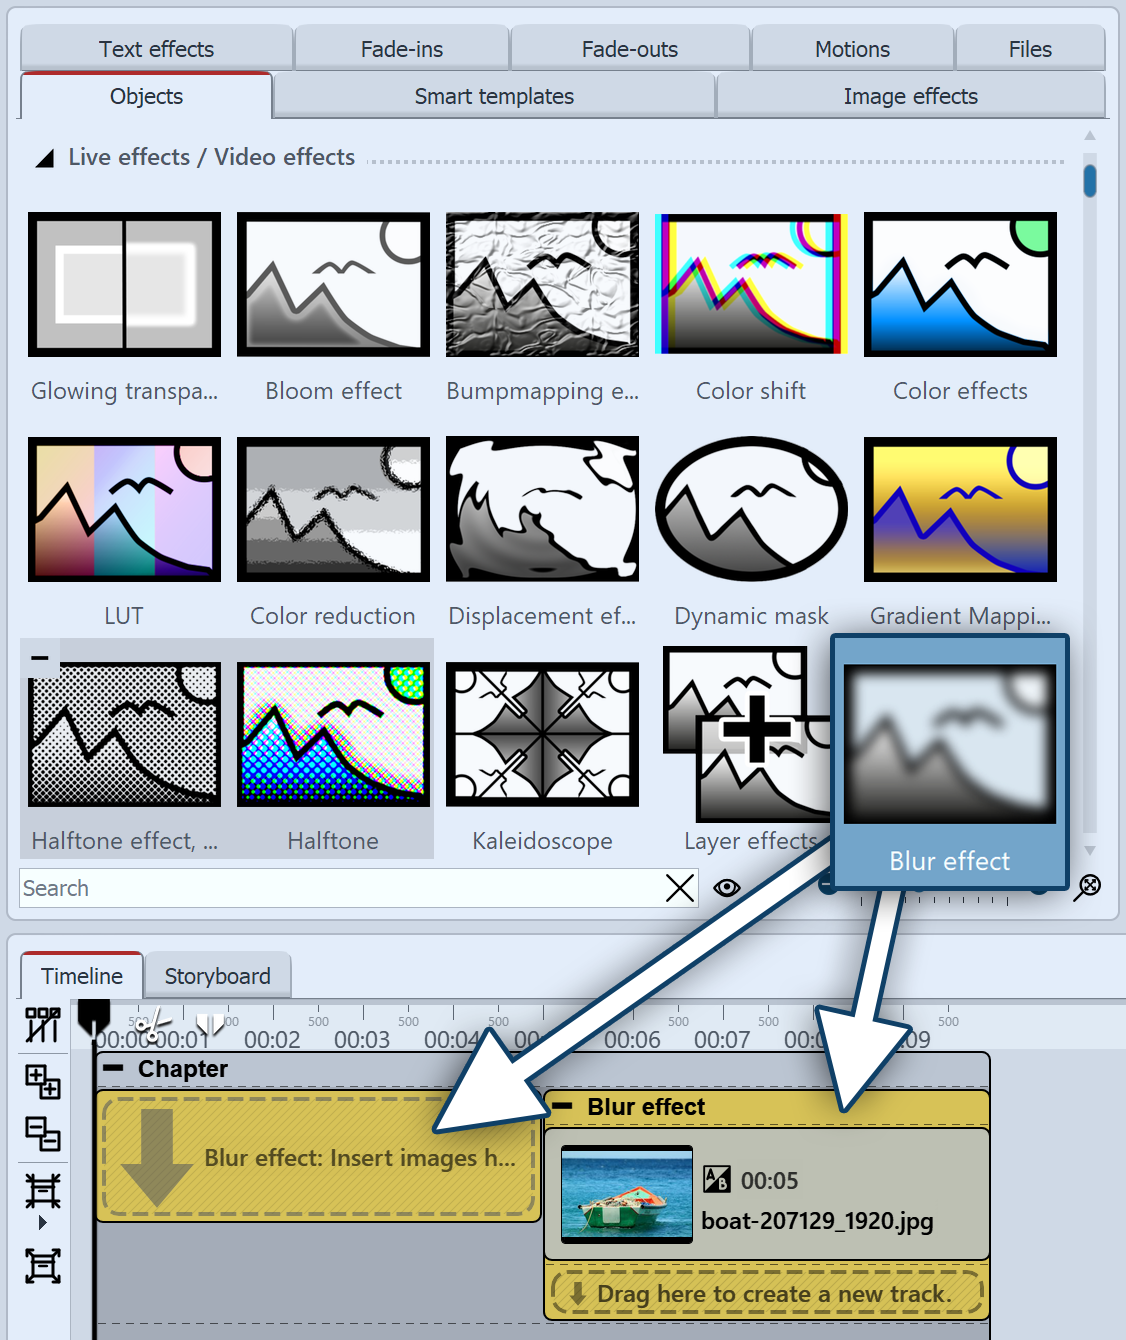
 Blur effect You can find the effect in the Toolbox below the tab objects in the live effects section. The blur effect lets the pasted objects appear blurred, to a chosed degree. |
|
You can find a finished project under file / open / sample project, in which, in which the blur effect has been applied so as to blur the background image. Find the sample project under the title "quote with image". |
 Inserting the Blur effect Drag the Blur effect from the Toolbox to the Timeline. 2 Add images To add images to the blur effect, drag an image object from the Toolbox into the content area, which is located inside the blur effect. In the following image selection, you can now select multiple photos by holding down the Ctrl key and clicking on the desired images. Select open, to insert the images.
|
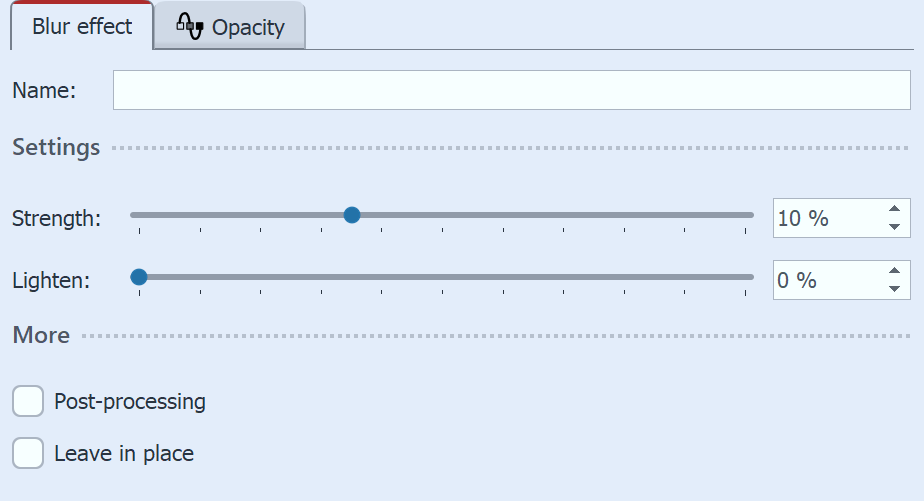
 Settings for Blur effect In the Properties window you can activate the post-processing for the Blur effect. This means that the effect will be applied to all elements which are enclosed within the effect borders. In the Name field, you can enter a name for the effect. This improves the overview in the Timeline. With the Strength slider you can set how strong the Blur effect is. The Lighten slider determines how much the Blur effect makes its contents appear brighter. In AquaSoft STAGES you can also change the strength of the blur over time. To do this, select the curves icon that is located next to the ruler for the blur strength. |