|
<< Click to Display Table of Contents >> Multiple texts |
  
|
|
<< Click to Display Table of Contents >> Multiple texts |
|
 Text object in the Toolbox To display multiple texts at the same time or time-shifted, use the Text object from the Toolbox. |
In this example you will learn how you can display three different texts, one after the other, with the same image. First of all insert an image into your Project. Then drag a Text object out of the Toolbox into the Timeline or Image list. Repeat this process twice, so that there is one image and three Text Objects in the Timeline or Image list. |
Select the first TextObject in the Image list or Timeline, by clicking on it. Now, in the Properties window, in the designated text box, enter your caption. If you would like the text to appear with movement, select an appropriate motion under Animation.

Entering text and selecting animation
Select the second Text Object and again enter the desired caption into the text box. Do the same thing for the third Text Object.
 Set display duration If the display duration for one of the texts is to be adjusted, go to the Properties window and under Duration set the desired display time for each of the texts. View the example that you have just created by clicking on the Play button or using f9 on the keyboard. |
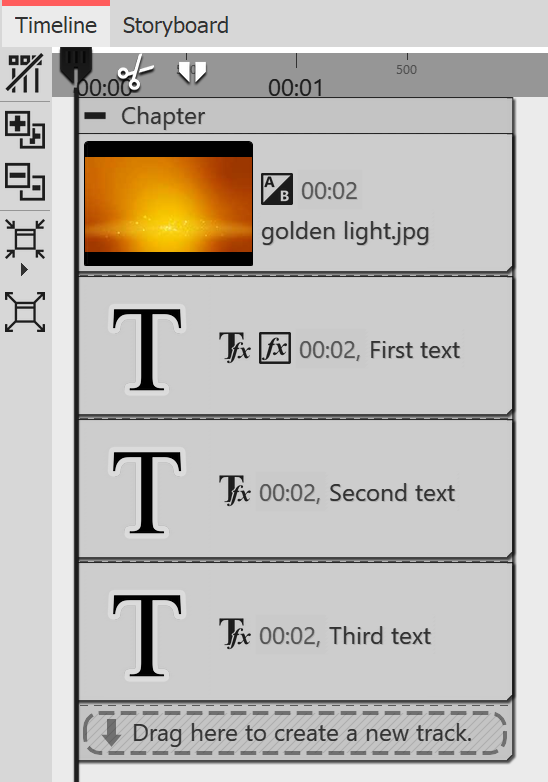
If you would prefer to view the texts simultaneously, drag a Chapter object from the Toolbox into the Timeline into last place, behind the other objects.

Multiple texts with Chapters in the Timeline
The Capital Object allows you to work with multiple tracks. In this way, Tracks are responsible for showing multiple Objects at the same time. After you have inserted it, the Chapter is located behind all other Objects. Now you need to move the image, which you have already inserted, and its accompanying text, into the Chapter. Proceed as follows:
1 Move the image into the ChapterClick with the mouse on the image in the Timeline. Use the mouse to drag the image into the empty Chapter. As soon as the image is on top of the Chapter, release the mouse button. |

Drag image to chapter
2 New track for Text object |
Drag first text object to track under image
3 Move more Text objects to new trackInsert the second Text object under the first Text object following the same procedure as described in the previous step. |
 Now the image and all the Text objects are arranged one below the other. When you play your presentation, you will notice that the text is displayed simultaneously. This happens because the Text objects are precisely arranged one below the other and are therefore displayed at the same time. In order to create a time delay, the position of the Text object in the Timeline must be altered. |
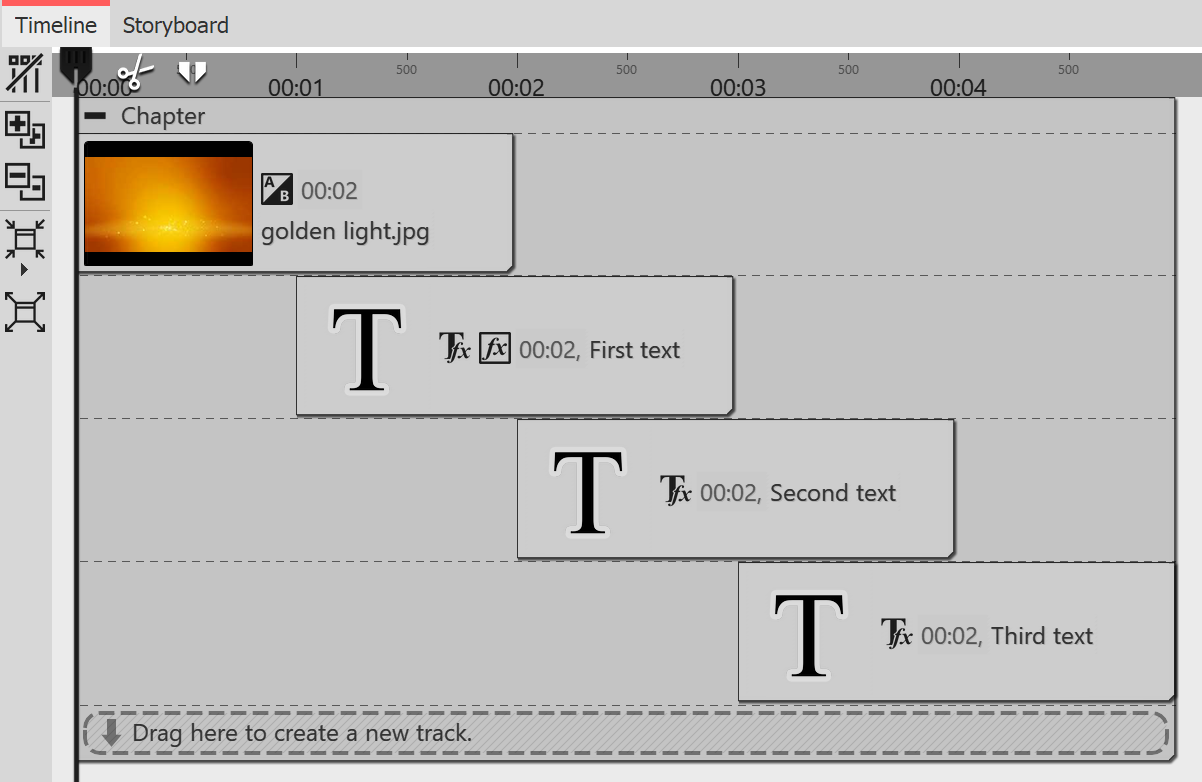 In order to adjust the position of the Text object and therefore the timing of the display of the text, use the mouse to drag the Text object slightly to the right. Do the same with the other Text object, so that there is a step-like arrangement. With this type of arrangement, the texts are displayed sequentially so that one text is visible before the next appears. Explore the changes by quickly playing the presentation. By doing this you can determine whether the texts are displayed according to your preferences. |