|
<< Click to Display Table of Contents >> Animating texts with a motion path |
  
|
|
<< Click to Display Table of Contents >> Animating texts with a motion path |
  
|
In AquaSoft Vision you can assign text objects a motion path. You can use motion paths to animate your texts in various different ways. In this chapter you will learn with reference to an example, how you can get a text to “fly” over an image.
1. Inserting your text Drag a text object from the Toolbox into the Timeline. An image should be located in front of the text object in the Timeline. You can also work with several tracks (see the instructions in the chapter "Working with multiple tracks"). |

Text behind image
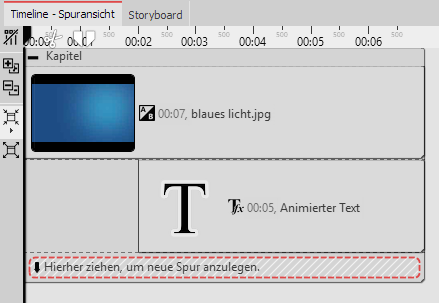
Text track underneath image
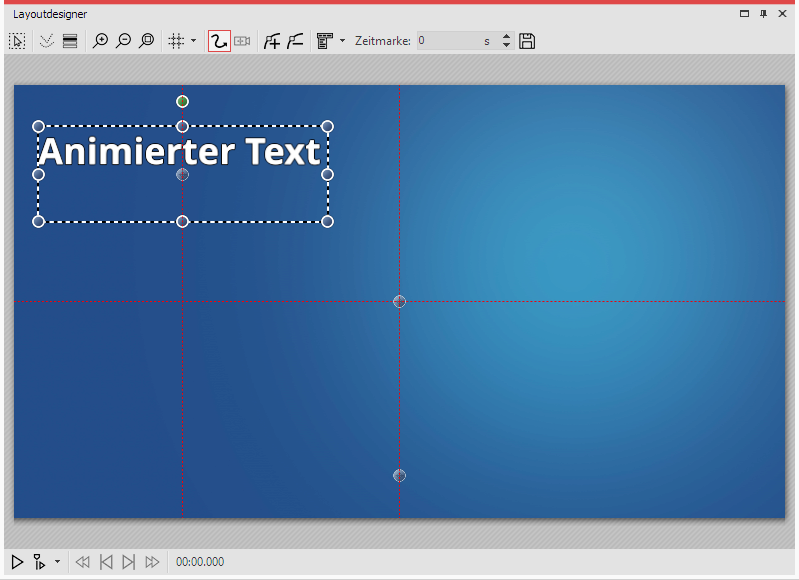 Positioning the text in the layout designer Click on the text object in the Timeline. You will see the text object in the Layout designer. It will be surrounded by a dashed border and some round dots. Move the cursor over the text and move the text with the mouse, holding down the mouse button to do so. This means you can position the text as you wish. Via the preview image in the Layout designer you will find various icons that will let you create your animation. |
|
This is the icon that will, in the Layout designer, switch to the motion path mode. Click on the icon to activate the motion path mode, before you create your animation. |
|
You can use this switch to insert new motion markers. Add a new motion marker and the text will move. This is how you create an animation. |
|
To remove existing motion markers you must highlight them in the Layout designer and then one click on this button will remove the active marker. |
|
You can also open a follow-up menu for the motion markers. |
|
A path’s duration is determined with time stamps. They determine the speed at which an object moves from one motion marker to the next. |
|
Motion paths that you have created can be saved and easily reused. This feature is only available in AquaSoft Video Vision and Stages. |
1. Adding a motion mark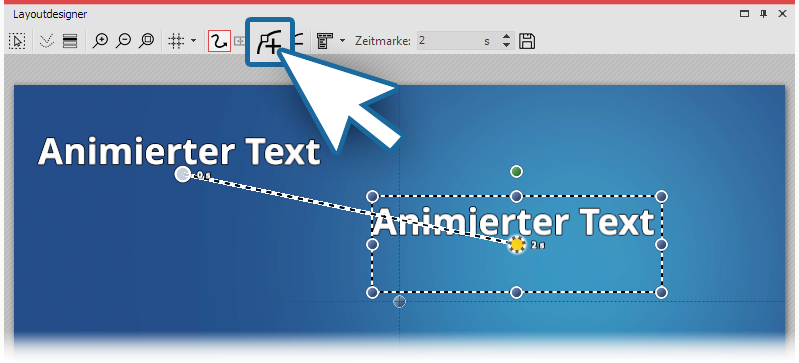 Adding a motion mark Add a new motion mark by clicking on the square plus symbol in the Layout designer. Now you will be able to see your text in its first position and also at its second position. The second text, or rather the second motion marker is now active. You can move and resize them in the Layout designer. The motion marker, that is already active is indicated by an orange dot. All motion brands that are not currently highlighted (or active) are displayed in a slightly transparent white. |
2. Changing the time stamp Changing the time stamp While the second motion marker is still selected (orange dot), enter a different value under time stamp. To slow down the movement between the first and second motion marker, you can increase the value to five seconds. When you increase the value of the first motion marker (default is 0.00s), you can adjust the start time of the movement to your preferred time. The times of the other motion markers will be automatically adjusted accordingly with the value of the first motion marker added on. |
3. Inserting a further motion marker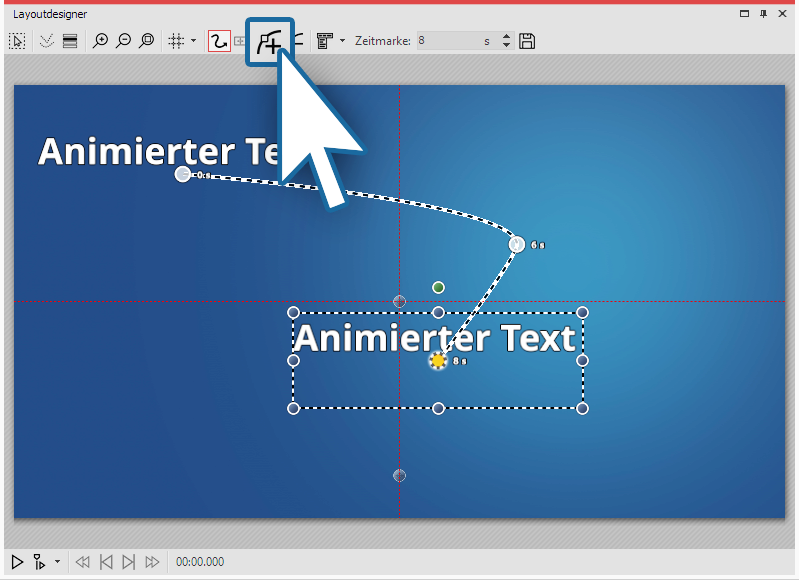 Inserting further motion markers Now use the squared plus symbol to add a new motion marker. Position the motion marker at the top right. Using the round drag handles, you can shrink the text. It will then seem as though the text is “flying” backwards. To preview this, activate the preview in the Layout designer or press f9 . |
4. Getting text to fly out of the non-visible area.You can also position motion markers in the non-visible area. This will allow the text to “fly” out of the image and then disappear. Add a new motion marker with the squared plus icon. Use the minus magnifying glass icon to zoom out of the view in the Layout designer. You have now shrunk the visible area in the Layout designer and you will find a larger gray area around the preview image. This area is not visible to the viewer of the final presentation and so, any objects within it, are considered invisible. Move the newly added motion marker into the non-visible area, allowing the text to “fly” out of the picture. |
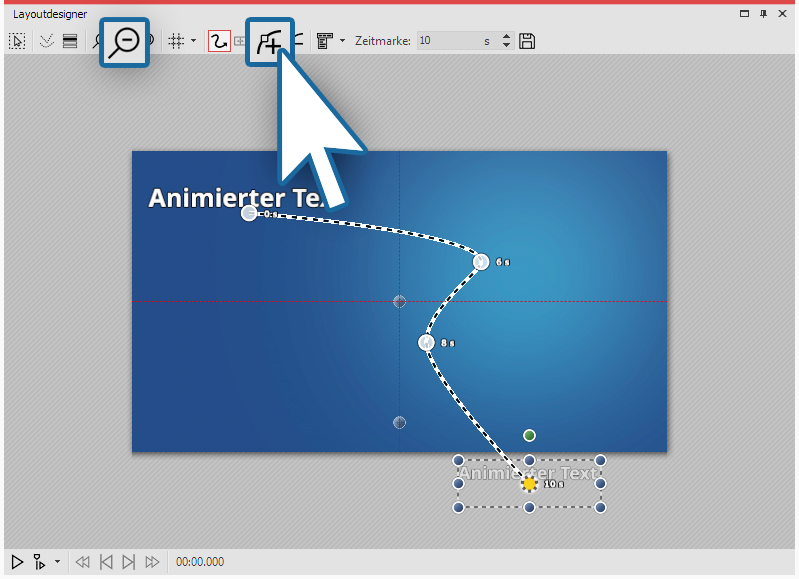 Getting the text to fly into the non-visible area |
7. Behavior along the motion path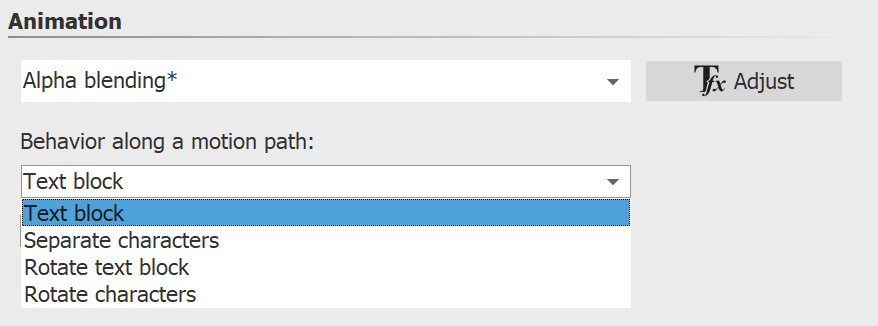 Behavior along the motion path The next need not follow the motion path as a whole. It is also possible to get the text to move along the path, for example, letter by letter. The options can be found in the properties window under behavior along the motion path. |