|
<< Click to Display Table of Contents >> Gradient mapping |
  
|
|
<< Click to Display Table of Contents >> Gradient mapping |
  
|
 Gradient mapping The Gradient mapping effect colors a photo or video using a gradient that can be set directly in the effect. Dark areas of the image get the color from the beginning of the gradient, and light areas of the image get the color from the end of the gradient. You can find the effect in the Toolbox under the Objects tab in the Live effects section. |
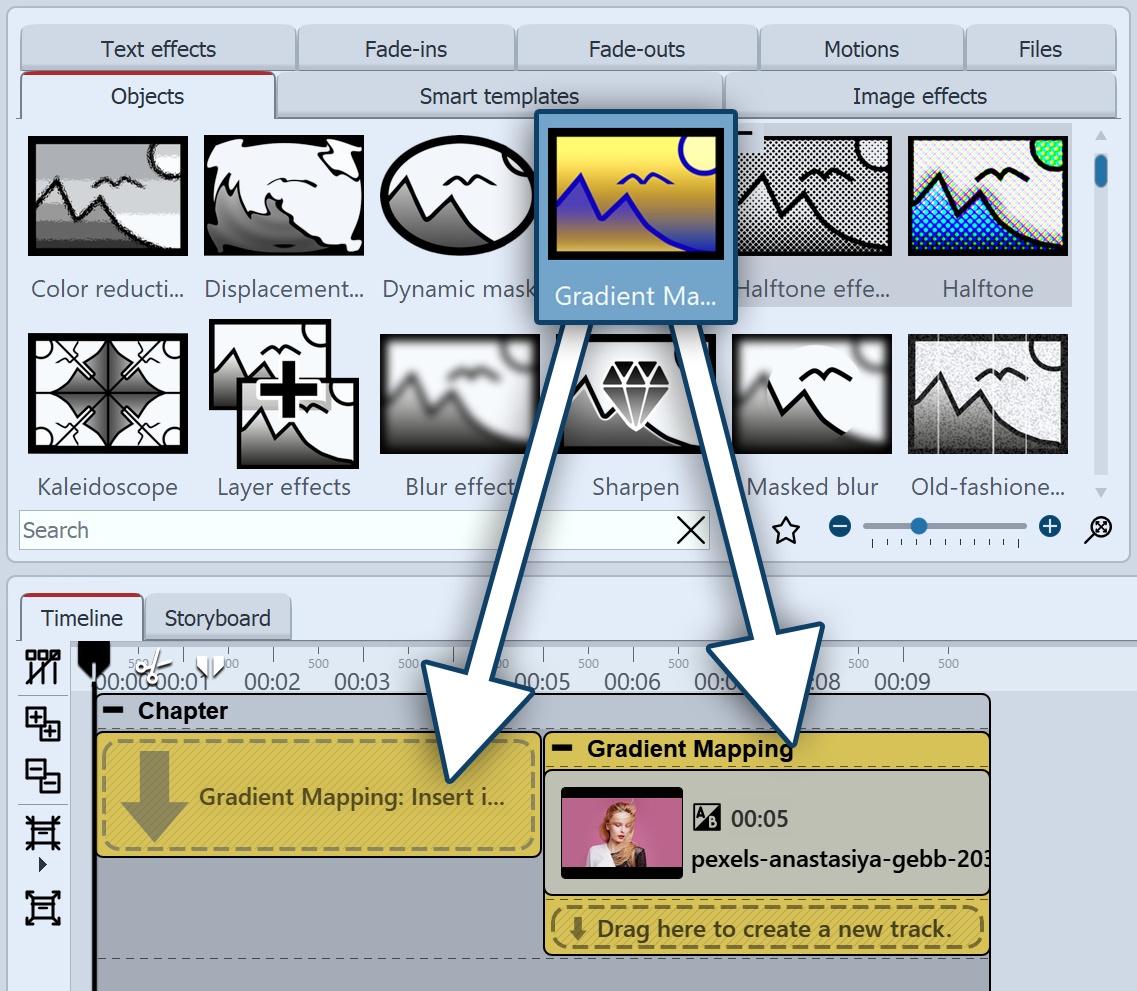
 Insert "Gradient mapping" To use the effect, you can drag it directly onto an image in the Timeline. You can also drag the effect to the Timeline and later insert one or more images into the effect. After you paste the image, a colored frame appears with the title of the effect surrounding the small preview image in the Timeline. When you click the colored frame, you can specify the settings for the effect in the Properties area. |
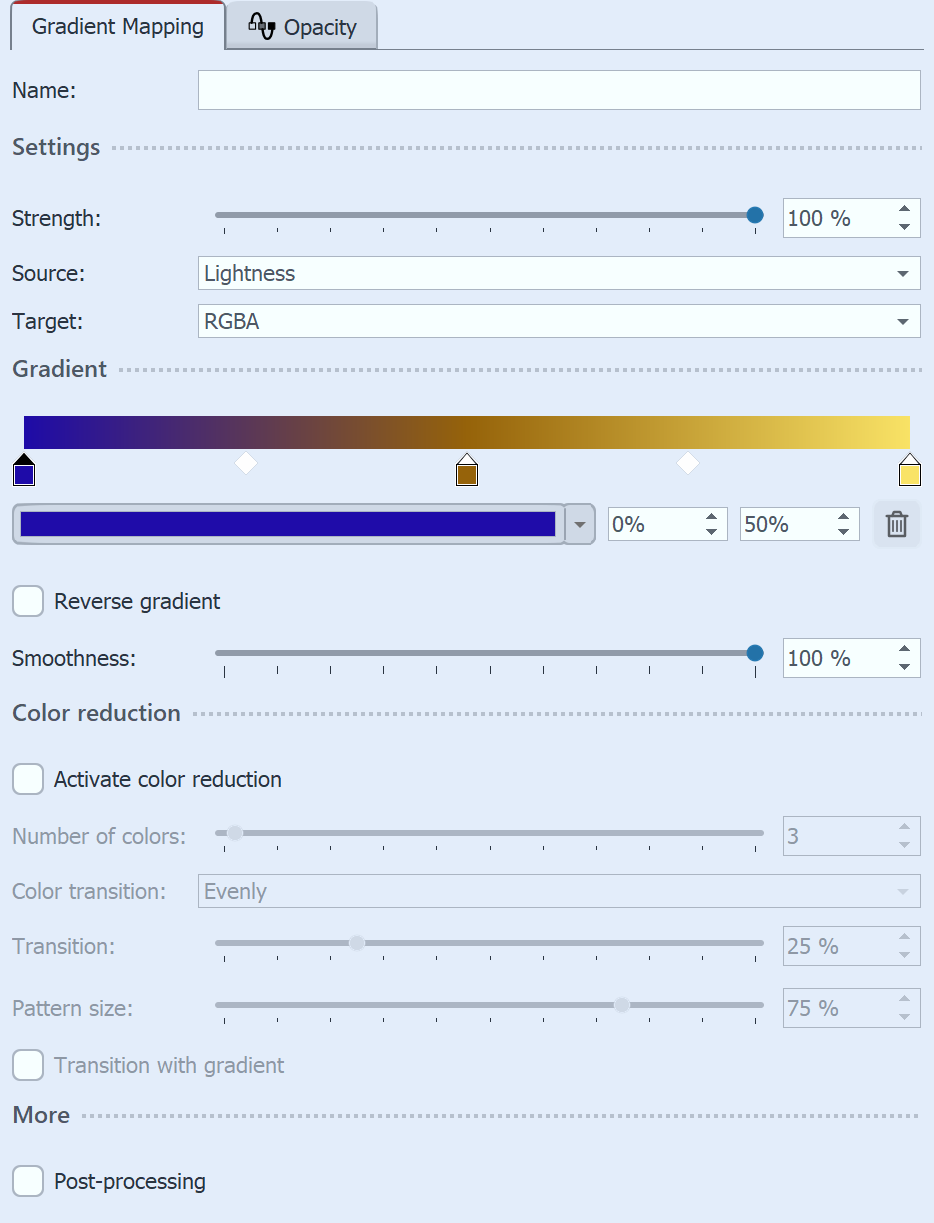
 Settings for "Gradient mapping" In the Settings area you can now define the properties of the effect . With the Strength you determine how much your original image should be overlaid by the effect. The Gradient mapping uses the source or source color to map it to the gradient. By default, the source is the brightness (i.e. the combination of all colors). However, only the intensity of a specific color channel can be used instead. The Target defines whether the entire image is to be modified(RGBA) or only a specific color channel. On the Gradient you select the colors whose values should be transferred to your image. To adjust the colors for the gradient, first click on the Color stop icon on the left, in the middle or on the right to select which color should be adjusted. The selected color stop is indicated by a black triangle. Click with the mouse in the color field to select the color for the color stop in the Color picker. For more on the settings, see the Dynamic gradient chapter. The optional color reduction lowers the number of colors of the gradient set in the effect. Depending on the selected setting for the color transition, you get soft or hard edges at the color transitions when color reduction is activated. In the Mini-templates section you can find different preset variants of the effect. On the thumbnails in the gallery you can see how each template works. Click the desired template to apply it to your image or video. |
 Original image without effect |
 Image with "Gradient mapping" |
 Image with "Gradient mapping" (Mini-template 3) |
 Image with "Gradient mapping" (Mini-template 6) |