Rotation


|
Rotation |
|
|
Just camera-pans are not enough? You want more zing in your slideshow? With AquaSoft ® DiaShow Studio you can rotate you pictures freely.
The following objects can be rotated:
It doesn't hurt to have read the Movements already, since the rotating is accomplished together with movement paths.
Create a new slide show
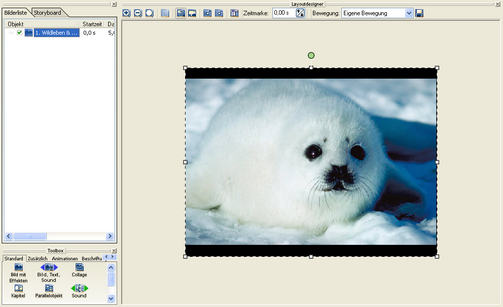
Now choose an image. Click on it in the image list so that it is shown in the layout designer. In the layout designer you can then reduce the size of the view a little by using
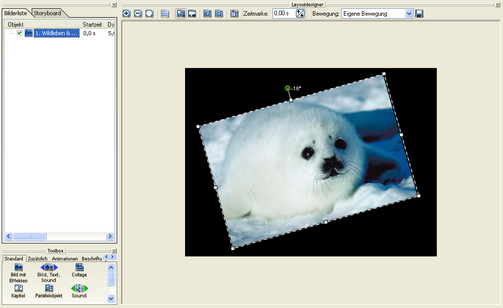
Now you can rotate the image using the green round handle. Click on it and hold down the mouse button, define the rotation angle. With the positioning frame you can also resize the image.
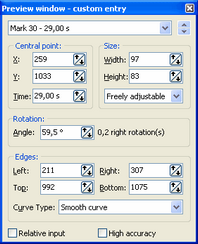
If you want to set an angle manually click on the image in the layout designer with the right mouse button and select "Custom Entry".
Under "Rotation" you can set the angle now.
Enhance your Collages by rotating the images inside the Collage .
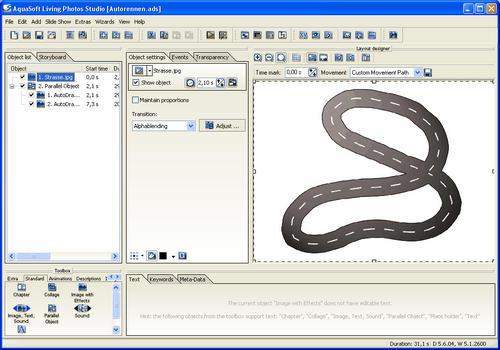
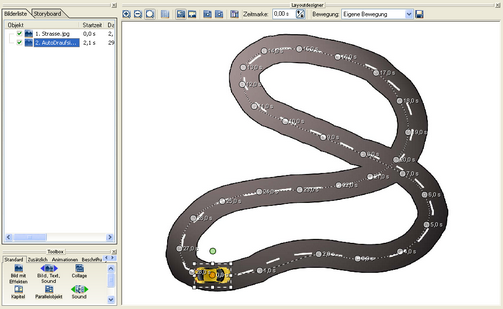
Of course this is not all that you can accomplish with the rotation function. Would you like to follow the route of your traveling with a car on a map for instance? Then you will now learn how you can combine movement marks with rotation.
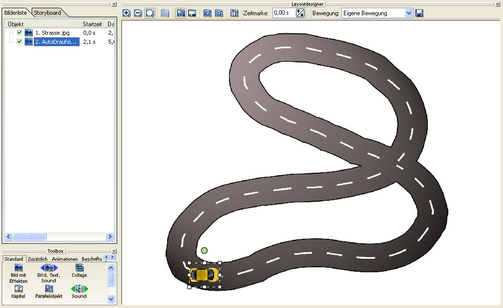
In our example we will let a car travel on a road. At first we will add the image of our road using the
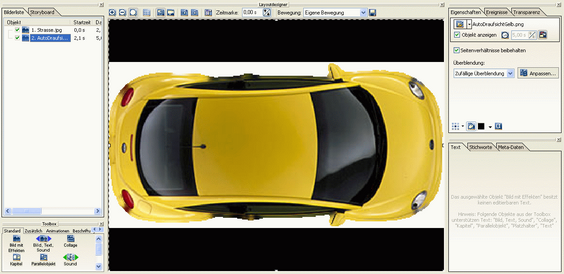
Next we need the car. It should be a PNG graphic with alpha channel.
In the "Toolbox" click on
The size of the graphic needs to be reduced with the help of the positoning frame. Then the use of alphablending has to be actived. To do this click the
Now the tour can begin. Add a new movement mark with
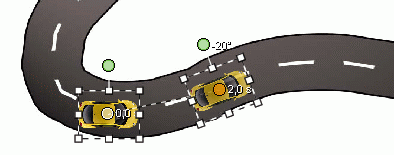
Add more movement marks and rotate the car accordingly.
Each movement mark can be adjusted individually. Click on a mark, so that it becomes highlighted. In the menu bar above the image you can change the number of seconds of the time mark.
Start playback with
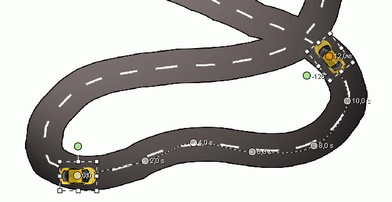
Eventually the movement path can look like this:
|
| Copyright © AquaSoft ® 1999-2007 www.aquasoft.de |