|
<< Click to Display Table of Contents >> Particles |
  
|
|
<< Click to Display Table of Contents >> Particles |
|
The Particle object shows you one or more images in reduced form and moves them on the screen. The behavior of the Particle object can be influenced in the Object settings window. The Particle object can also be provided with motion paths. You can also rotate the Particle object.
The settings of the Particle object are very diverse. It is not possible to make any recommendations here, because each parameter enables completely different animations in some cases.
|
The best way to get to know the Particle object is to try it out yourself. In the program, in the Toolbox - Objects - Animations, you will find, for example, the Sparkling cloud, which is created with several particles with different properties. |
Icons
 |
|
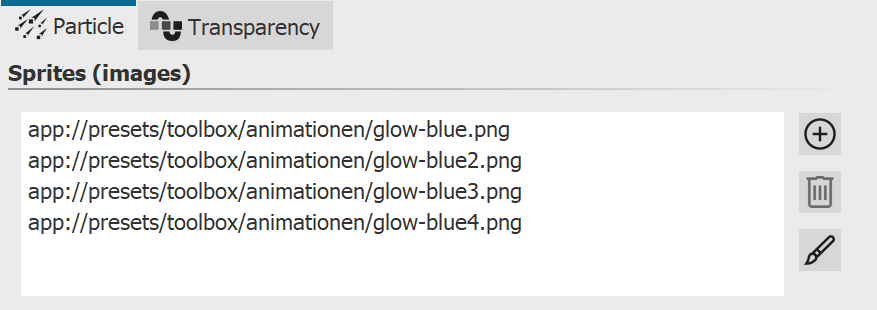
Use this icon to insert graphics into the Particle object. For the particle object to work, you must have inserted at least one image here. These images are called Sprites in the following. If you insert multiple Sprites, either one of them will be randomly selected per particle, or an animation will be created from it. You can set more precise settings with the Sprite animation option. Particularly well suited are cropped images with irregular outlines as sprites.Use this icon to insert graphics into the particle object. For the particle object to work, you must have inserted at least one image here. These images are called sprites in the following. If you insert multiple sprites, either one of them will be randomly selected per particle, or an animation will be created from it. You can set more precise settings with the Sprite animation option. Particularly well suited are cropped images with irregular outlines as sprites. |
|
Select an image from the list of sprites and delete it by clicking on this icon. |
|
You can apply one image effect to the sprites. The one effect is applied to all sprites together. |
There are two basic particle control options.
On the one hand, you control Particle creation, i.e. when and how often and where they emerge, how long they exist and what they look like.
On the other hand, you control how a particle changes during its lifetime in the Particle life section.
|
The particle object supports not only simple values but also ranges of values or curves, with values that change over time. The wave symbol allows switching between these possibilities.The particle object supports not only simple values but also ranges of values or curves, with values that change over time. The wave symbol allows switching between these possibilities. Value - fixed value over the entire time, e.g. Opacity = 100%. Value range - random selection between two values, e.g. opacity of the particle should be randomly selected between 50% and 100%. Curve Stages - over time the value follows a freely definable curve, e.g. opacity should be 100% at the beginning of the particle object and 0% at the end. Curve range Stages - the value is a random selection from the range of values between two curves |
|
Filter can be used to modify the final result of a curve once again, i.e. to divide it into several stages. |
Particle system
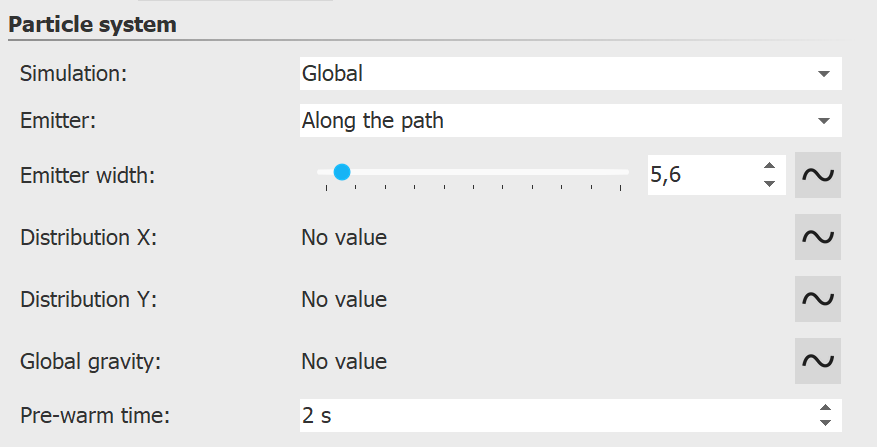 |
Simulation |
Only if the particle object has a motion path, the change of the simulation type has an effect. Local - The individual particles remain in the coordinate system of the particle object after their creation and move together with it. Global - Particles originate at the current position of the particle object, but are detached from it afterwards and fly their own path. |
Emitter |
Sp Specify here the position or shape where the particles are created. Rectangle edge - the particles originate at the outer edge of the particle object and move to the opposite side. From which edge the particles come determines the direction. Whole area - The entire rectangular area of the particle object is possible place of origin of the particles. From point - The particles are created only in the center of the particle object. The size of the point can be expanded to a circle with the setting of the Emitter width. Along the path - If this option is used, the particle object's motion path is used like a drawing. The particle object now remains still and the particles are created evenly distributed along the entire path. The Emitter width can be used to control the area around the motion path in which the particles are allowed to form. |
Emitter width |
see Emitter |
Distribution X/Y |
Stages The location of particle formation can be distributed to specific areas on the X/Y axis using a curve. |
Global gravity |
The particles are deflected from their position and fall down faster or slower depending on the set value. |
Pre-warm time |
If the particle system has to settle in before it is to be displayed, you can specify here the time that the system is pre-simulated invisibly before it is displayed. The time specified here is not part of the presentation. |
Particle creation
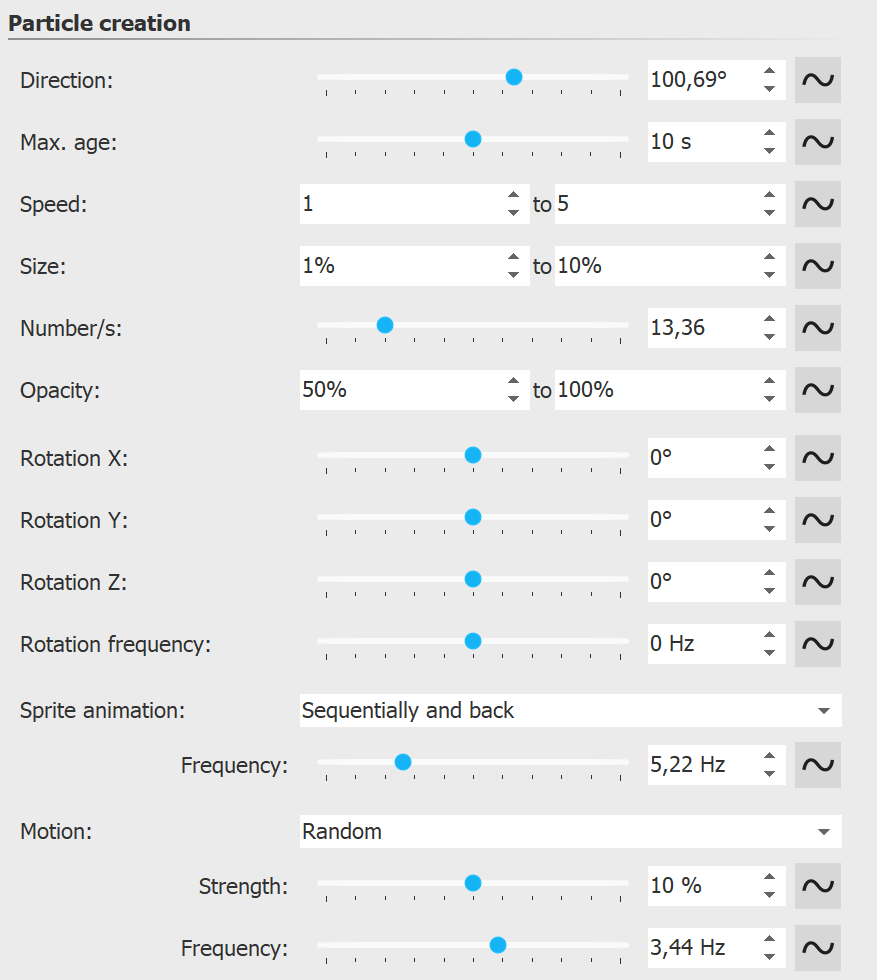 |
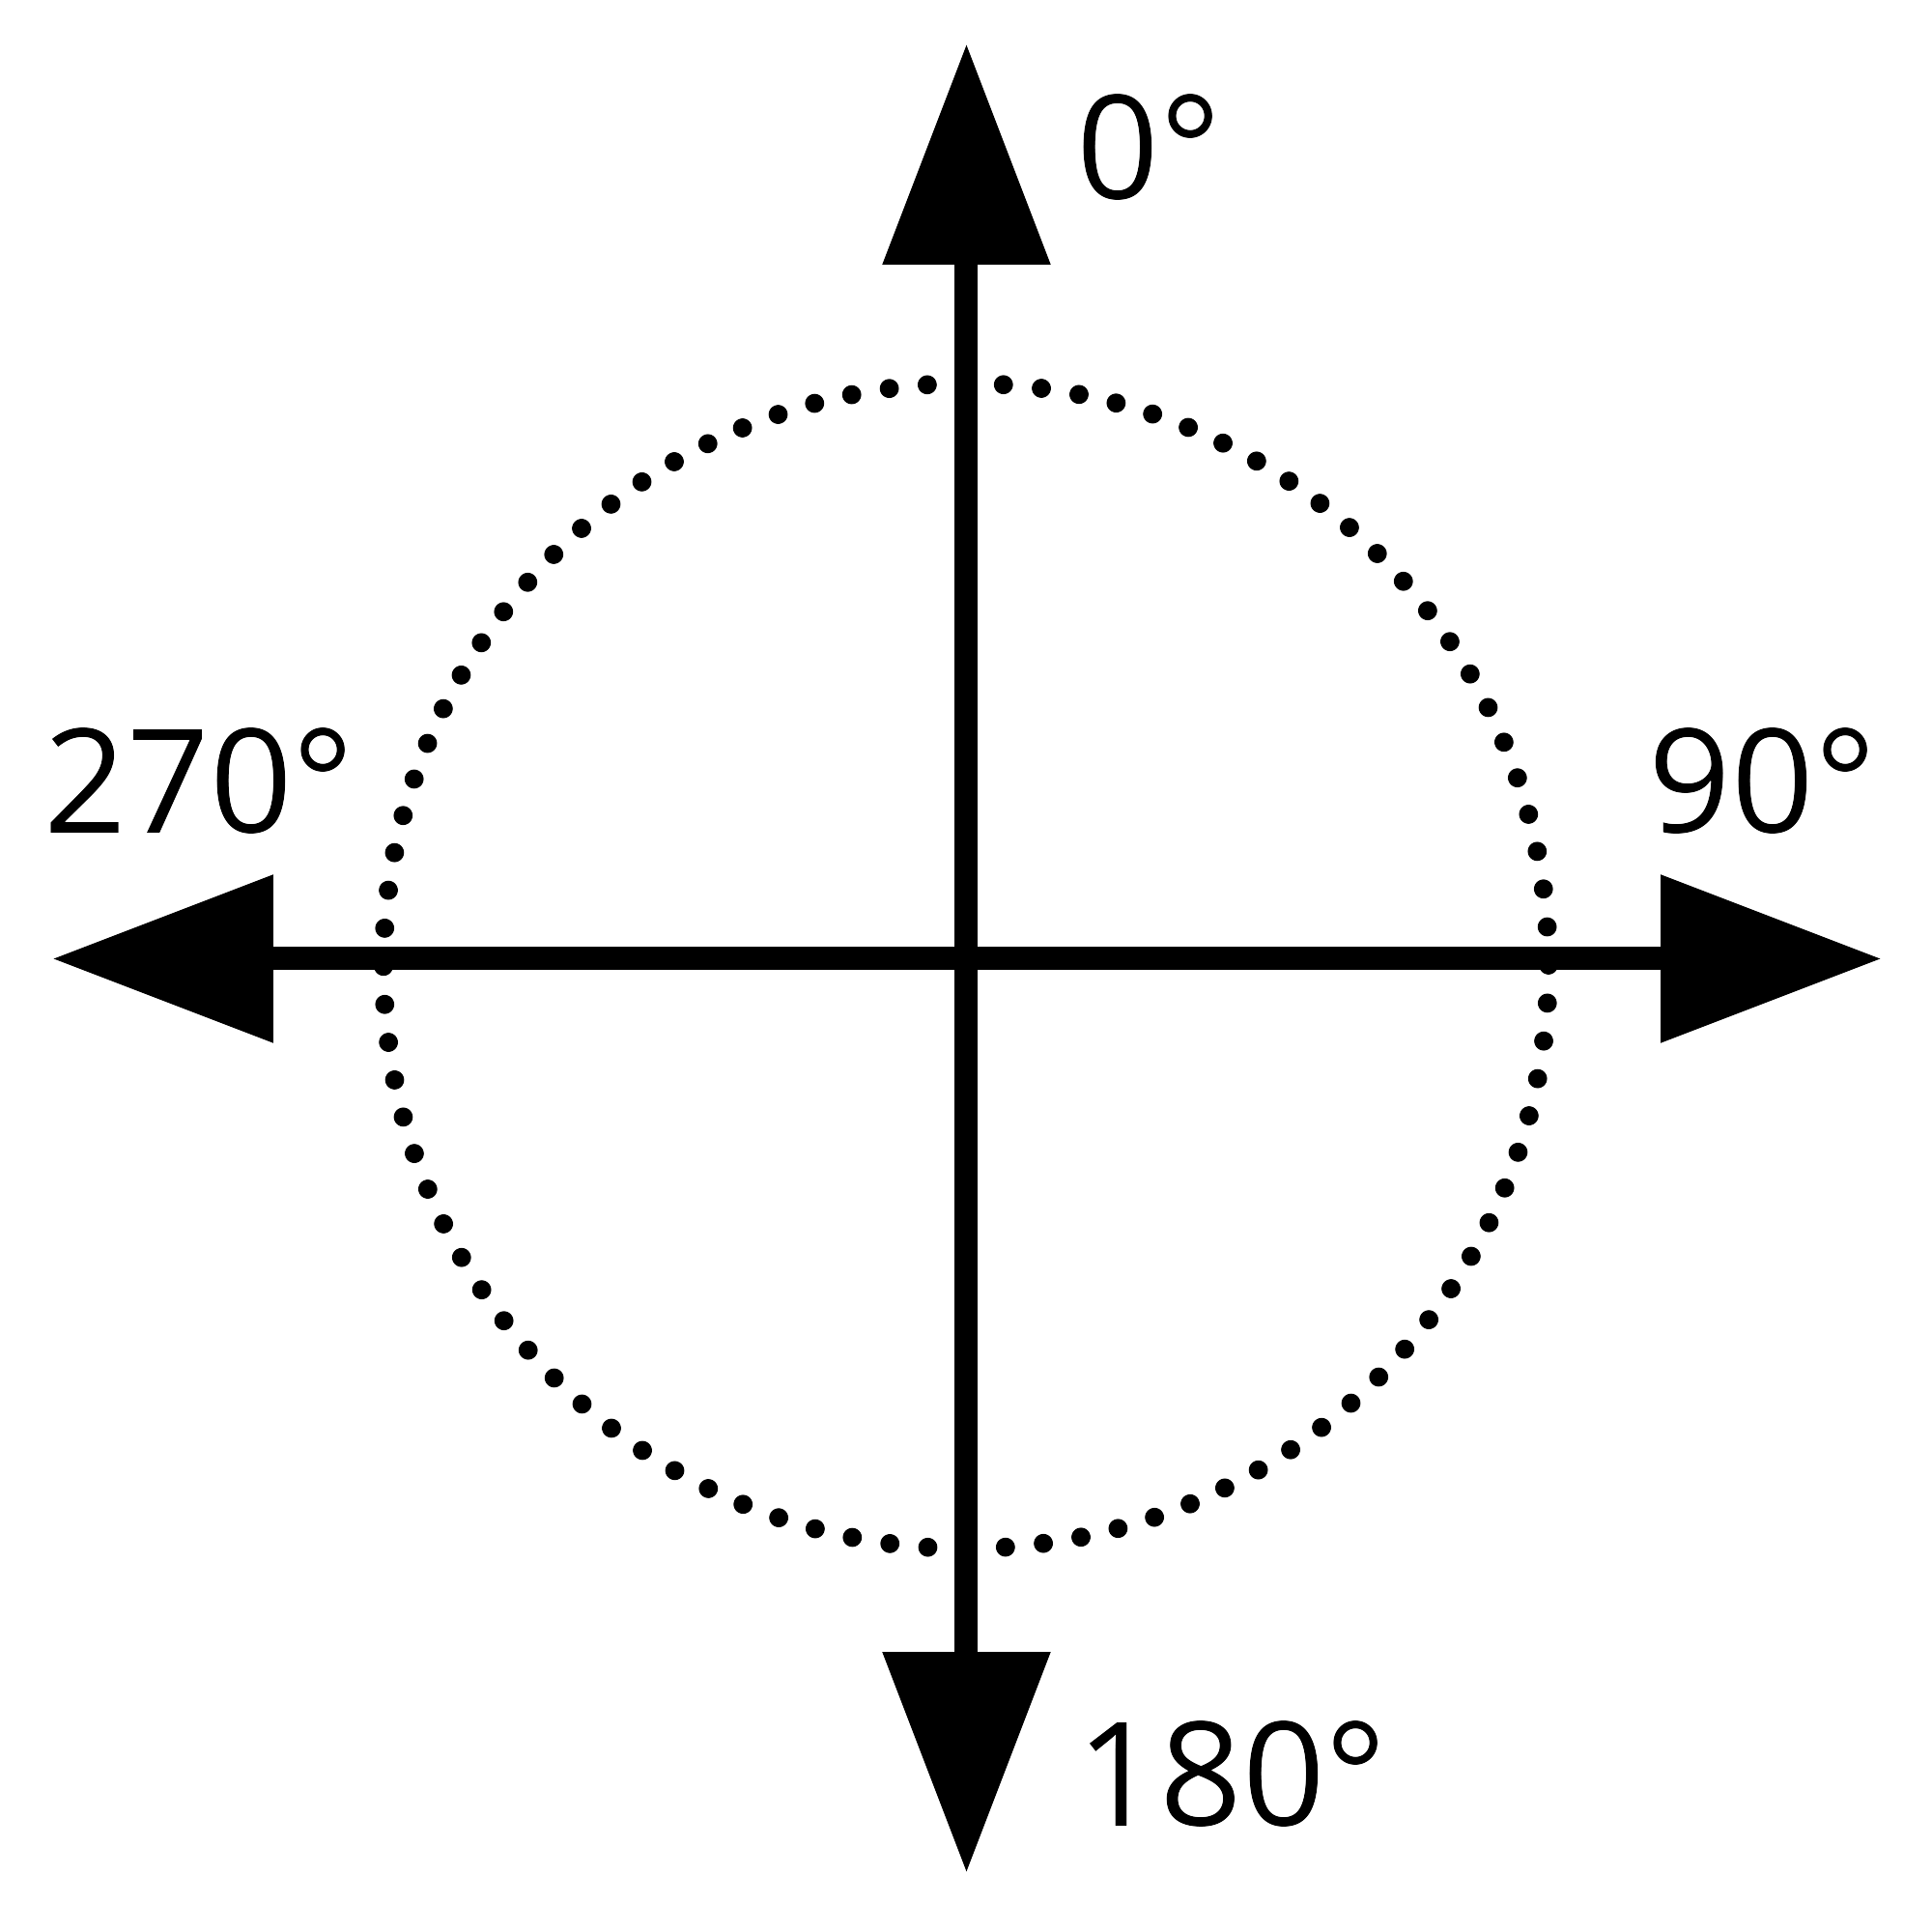
Direction |
|
Max. age |
A particle has an adjustable lifetime. If a particle should disappear after e.g. two seconds, enter this time here. |
Speed |
You set the speed of the movement under Speed. The higher the value, the faster the particles fly across the screen. A value of 0 means no speed. The particles then remain where they were created. The speed is given in "virtual screen units per second". Thereby 1000 corresponds to the complete screen size. A value of 1000 means that the particle flies over the entire screen within one second. |
Size |
Here you determine the size of the particles. The size is calculated based on the position frame in the Layout designer. If the position frame is at its full size in the Layout designer and the particle size value is set to 10%, the particles have 10% of the size of the position frame. If you reduce the size of the position frame, the particles become smaller relative to it. Here it often makes sense to set a range of values instead of a fixed value in order to bring more variation into the particle system. |
Number/s |
With the Number you set the amount of new particles to be created per second. Together with the maximum age of a particle, this results in the number of particles visible at the same time. Note here that more particles also require correspondingly more computing power. |
Opacity |
Specify here how opaque a particle should be when it is created. As with size, it is often useful to enter a range of values for Opacity in order to create variations, e.g. for snowflakes, whose size also varies in nature. |
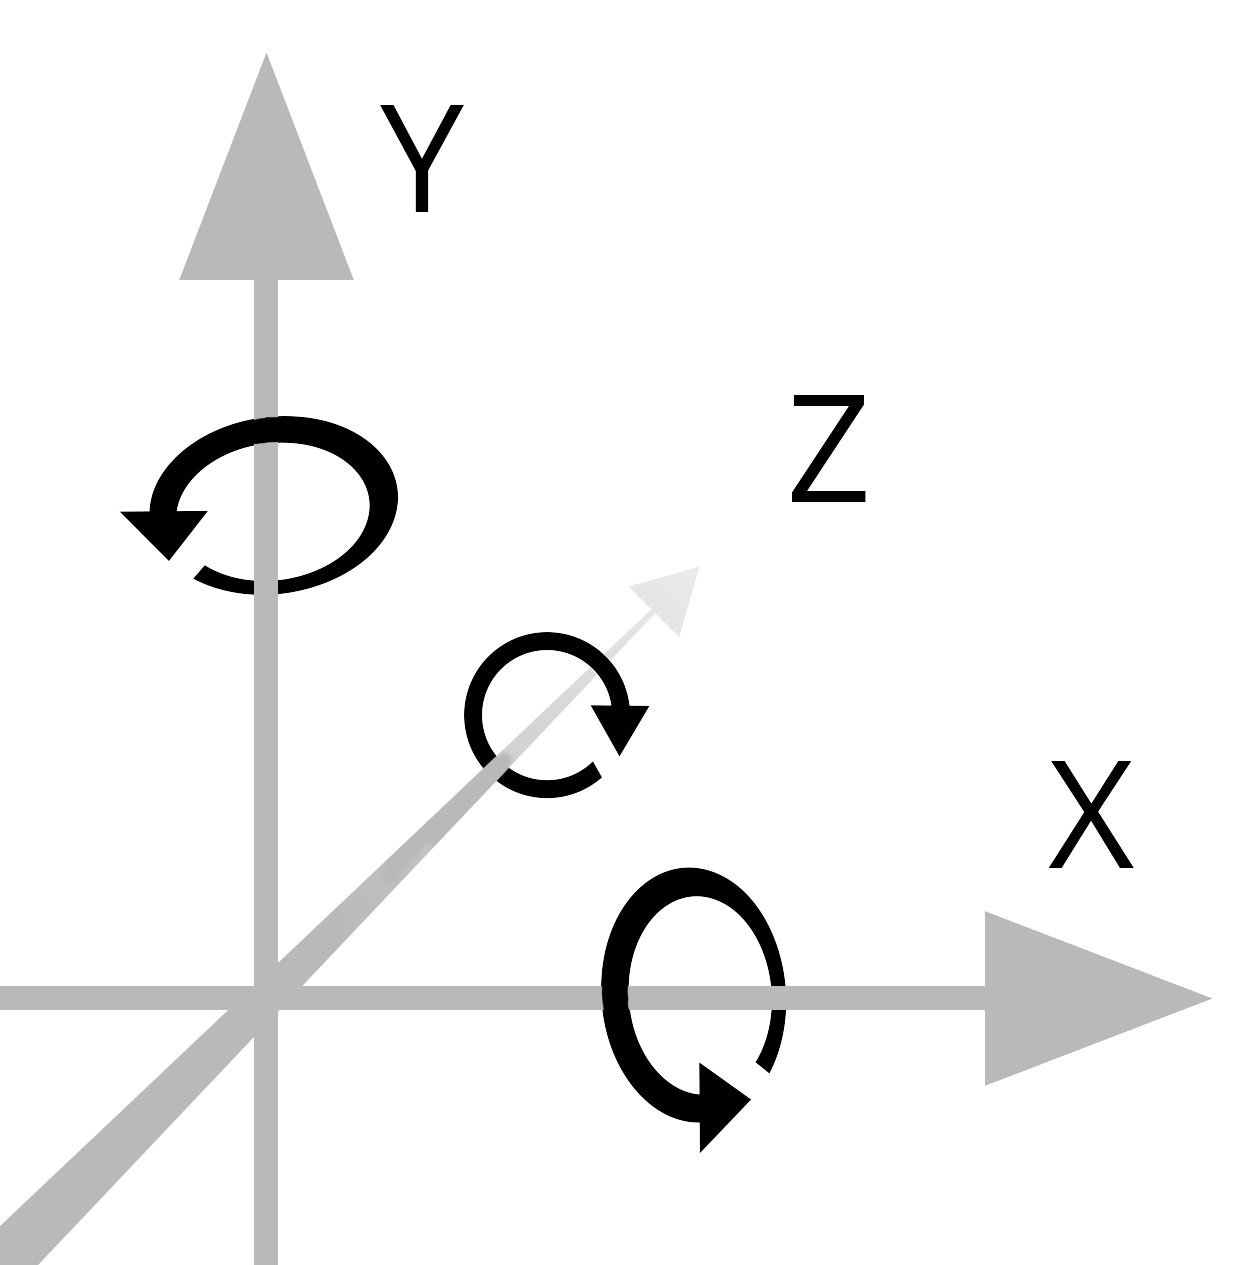
Rotation X/Y/Z |
|
Rotation frequency |
Rotation speed around the Z axis (animated). |
Sprite animation |
The setting is only useful if at least two different sprites have been added. none - For each new particle, one of the available sprites is randomly selected and not changed over time. Random - Over the lifetime of the particle, the sprite used changes regularly. One is randomly selected from the list of available sprites. Sequentially - All sprites are displayed one after the other. When you reach the last one, the first one starts again. Sequentially and back - Like Sequentially, but after the last sprite the list is not repeated, but worked backwards to the first sprite. Use the Frequency to set how often the Sprites change (does not apply to Sprite animation "none"). The specification of 0 represents a special case here: In this case, the animation of all Sprites takes place exactly once in the lifetime of the particle. With the help of the particle option Blend sprites the change of the Sprites does not take place abruptly but the particles blend smoothly into each other. |
Motion |
Each particle flies a certain path. Via the movement you can specify a deviation from this path without actually redirecting the particle, i.e. the particle always returns to its original path. Several movements are available: none - no deflection of the particle Wave oscillation (sinus waves) - The particle performs a wave-like motion along its path. Circular motion - The particle describes small complete circles around its orbit. Random - The particle is randomly deflected perpendicular to its path. Randomly in all directions - The particle can be randomly deflected in any direction on the surface. Random 3D - Deflection occurs randomly in any direction, also modifying the depth in space. |
Strength |
Here you set how strong the deflection from the original path of the particle should be. The higher the number, the more the movement strength increases. The strength depends on the size of the particle. Note: With the "random" movements, the movement strength must often be increased for the desired effect, since the strength only indicates the maximum deflection, but on average only smaller deflections are flown. |
Frequency |
The frequency indicates how often the movement is performed. The higher the number, the faster and more frequent the movements. |
Particle life Stages
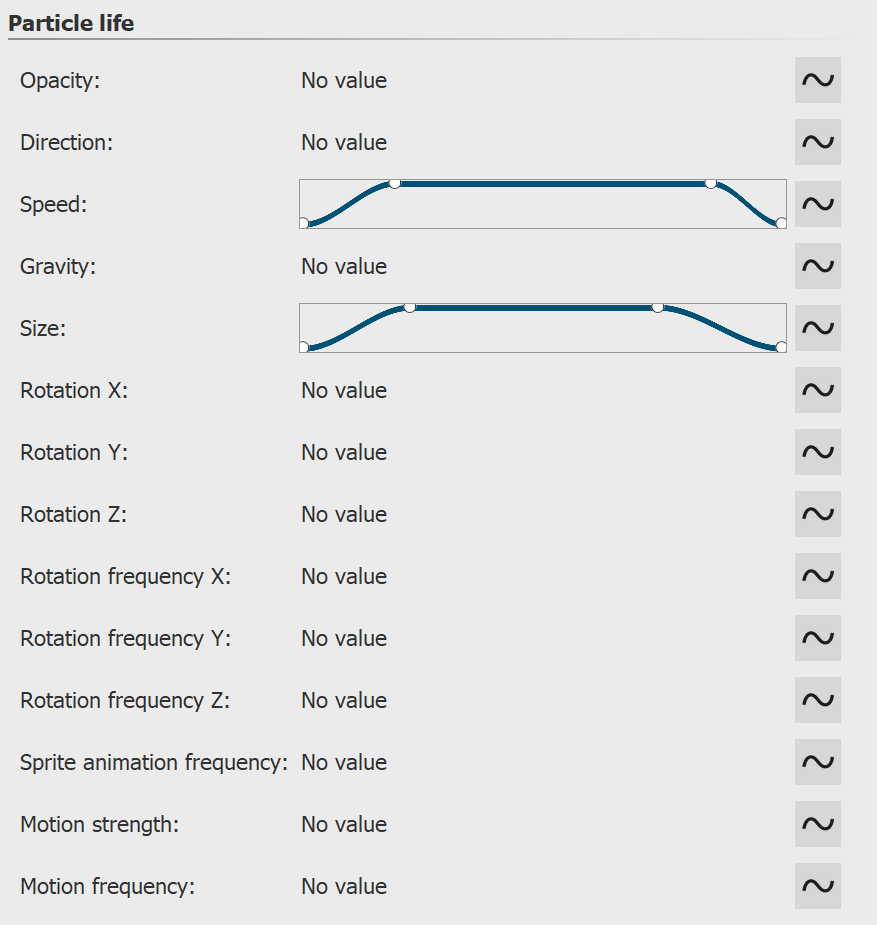 All values here are relative to the initial values when a particle was created. For example, if a particle was created with an opacity of 50%, 100% opacity of the particle life setting corresponds to this value of, say, 50%. |
|

Clip contents |
Cuts off everything that is not in the frame of the particle object. The setting is usually only useful for local simulation. |
Rotate emitter in direction of motion path |
If a motion path is assigned to the particle object, the entire particle object and thus the emitter rotates in the direction of travel of the motion path. |
Apply emitter rotation to particle flight direction |
If the emitter is rotated using a motion path, newly created particles are assigned this direction as their flight direction. |
Apply emitter rotation to particle rotation |
If the emitter is rotated using a motion path, the particle sprites are rotated in the same direction. |
Apply emitter size to particle rotation |
The change in size of the emitter affects the change in size of the particles. |
Particle flight direction defines particle rotation |
The particle sprites align themselves with their trajectory. |
Blend sprites |
If a sprite animation is selected and there are multiple frames for a particle, they will be smoothly blended. |
Reverse particle order |
New particles appear in front of or behind the old ones. |
Use blend mode "Addition" |
Meeting particles change their brightness and "glow". |
Random value |
Particle generation can be made exactly repeatable via a random value. |
Transparency is described in the "Animated transparency" chapter.