|
<< Click to Display Table of Contents >> Sound Wizard |
  
|
|
<< Click to Display Table of Contents >> Sound Wizard |
  
|
Ultimate Stages With the help of the Sound Wizard you can record spoken comments and sounds via a microphone connected to the PC. There are two ways to use the Sound Wizard: •With the Toolbox object Sound recording you insert a Sound object into your project, for which you start a microphone recording directly with the insertion. •Use the Wizards menu item to call up the Sound Wizard, which shows you the images in your project that you can add a sound comment to. |
 Sound recording When working with the Sound recording object, you get a Sound object that you can move and arrange freely in your project. When recording via the Sound Wizard, the sound file is not directly visible in the Timeline, Storyboard or the Image list, it is linked to the image. |
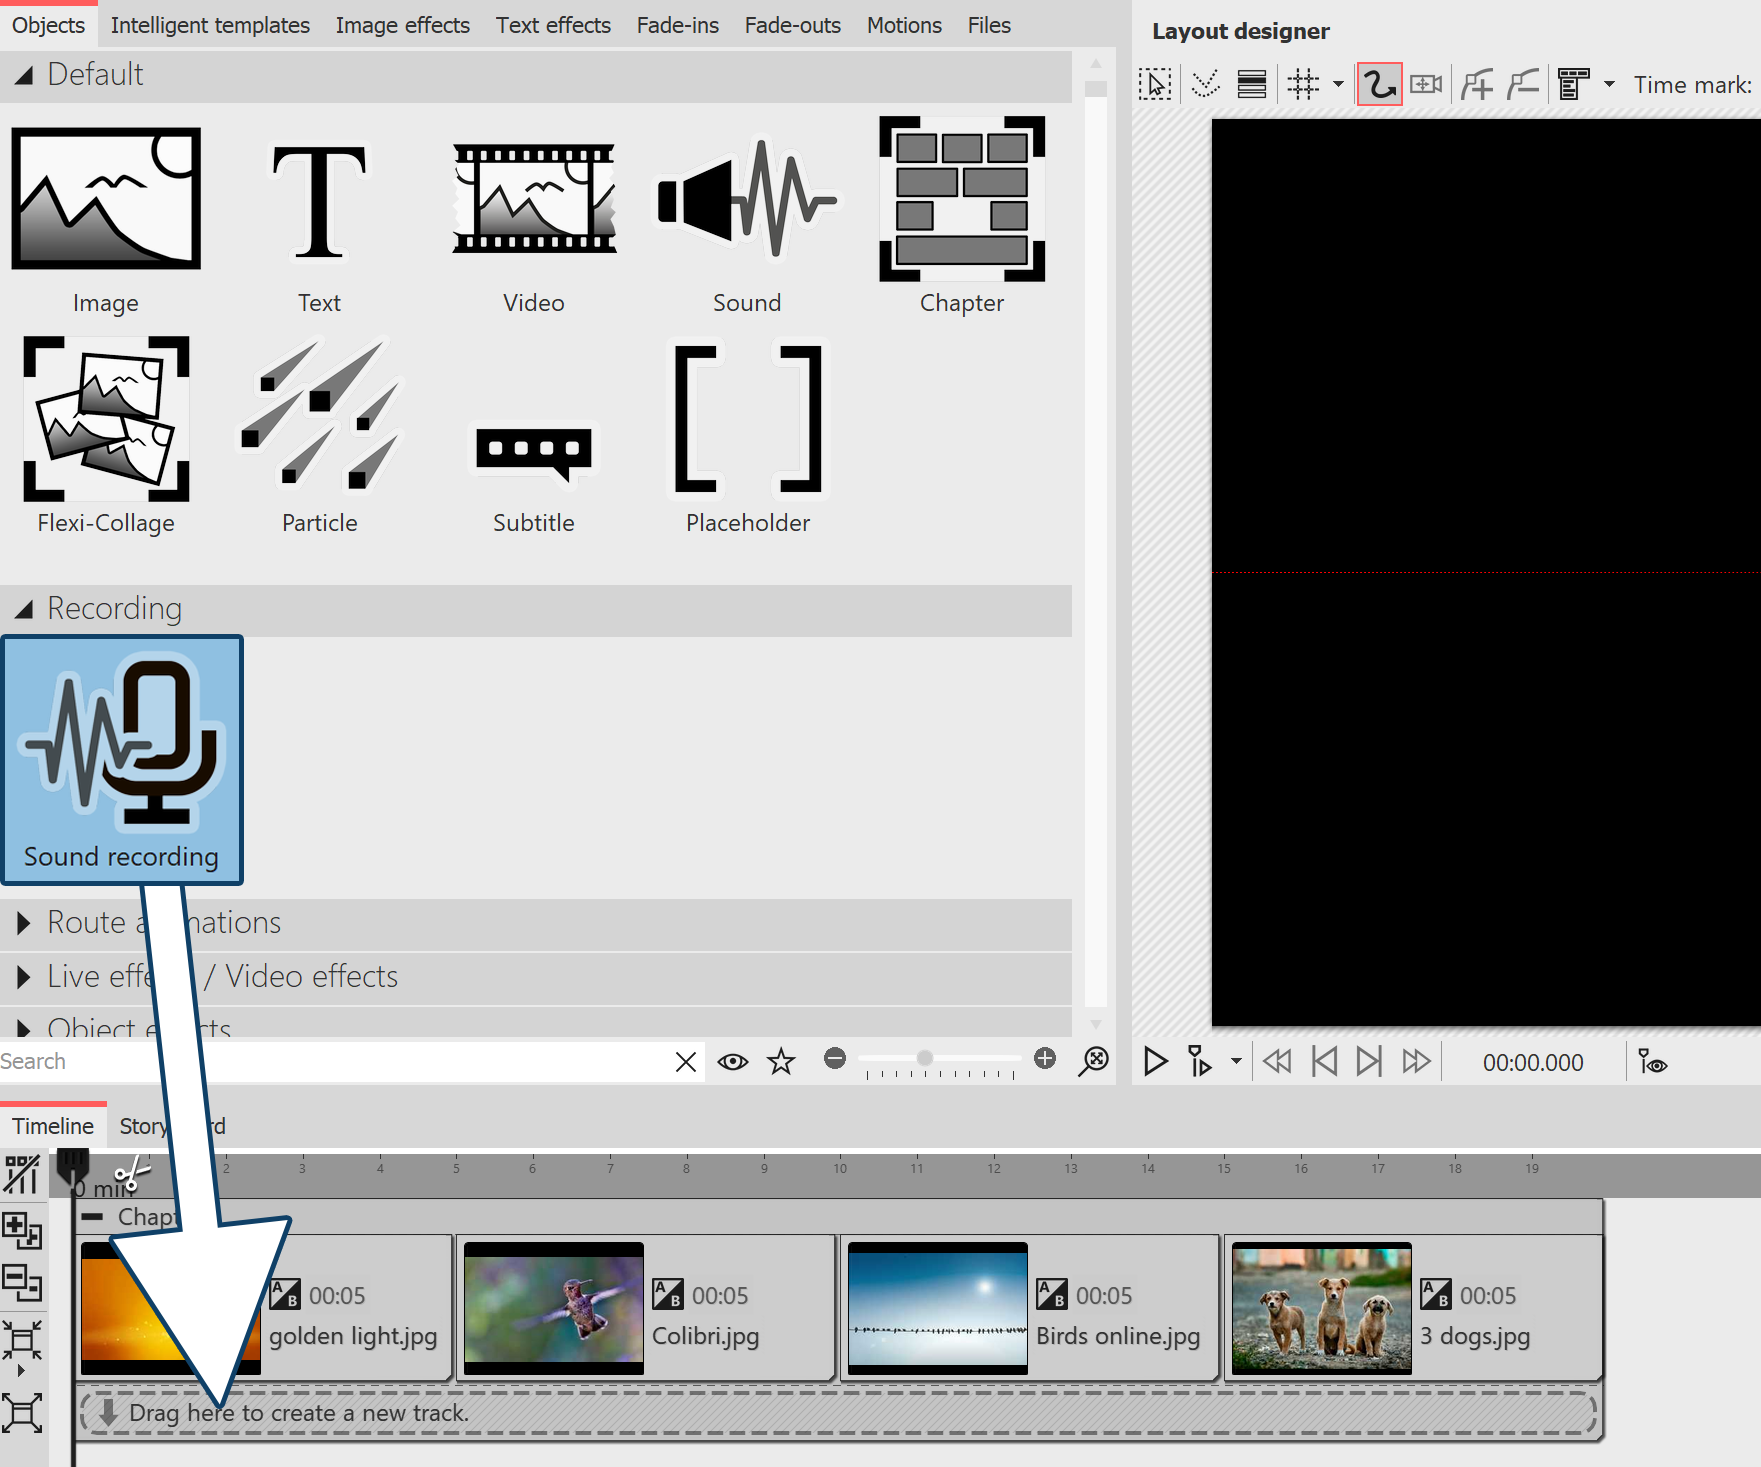 Use Sound recording object Drag the Sound recording object from the Toolbox to the Timeline to the position where you want to insert a comment. The Sound Wizard opens. Complete steps 2 and 3 described in the next section to record your sound. Then, to finish recording and send it to Timeline, click Finish in the Sound Wizard. |
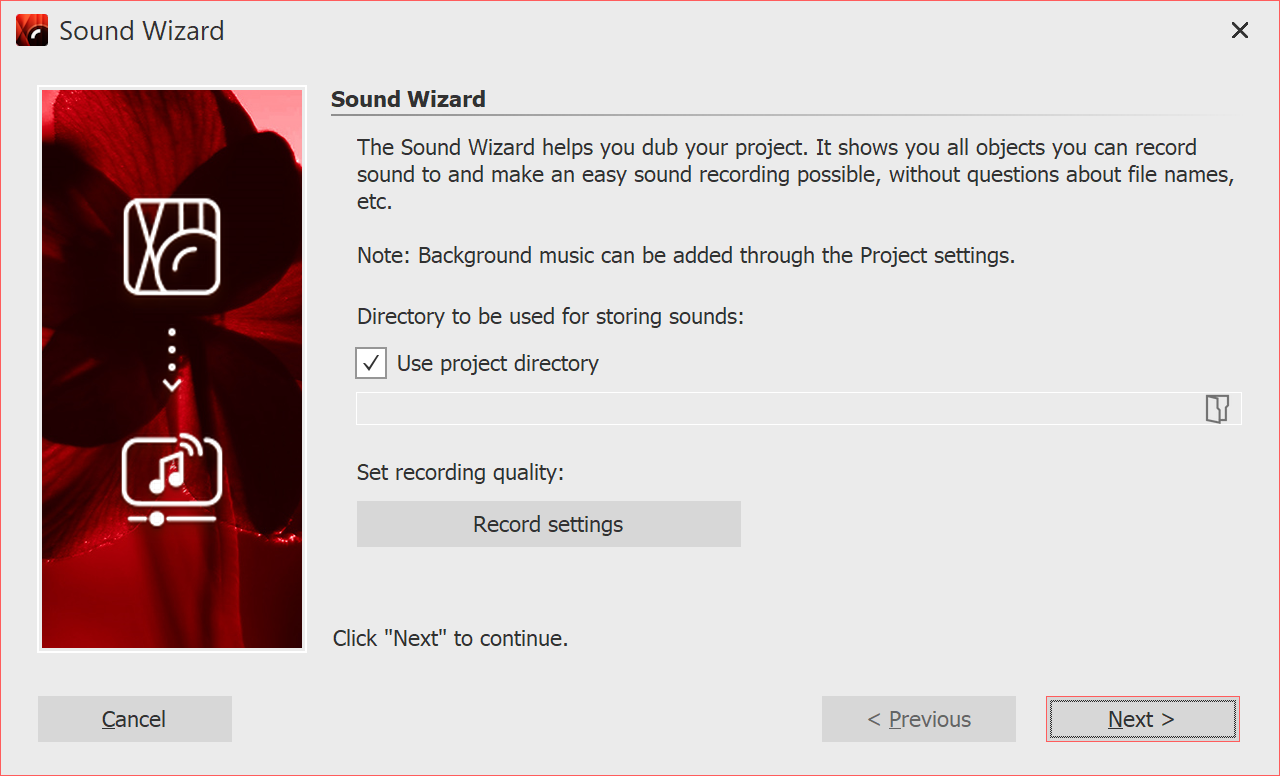 Recording directory and settings 1 Open Sound Wizard Call up the Sound Wizard via the Wizards menu item. |
2 Set output directory
If your ads project file is already saved, the resulting files will be saved in the project directory by default.
To select a different directory, click the folder icon and select the directory where you want to save the recordings.
Via Recording settings you reach the dialog for the differentiated definition of the settings for the sound recording, which you normally do not have to change.
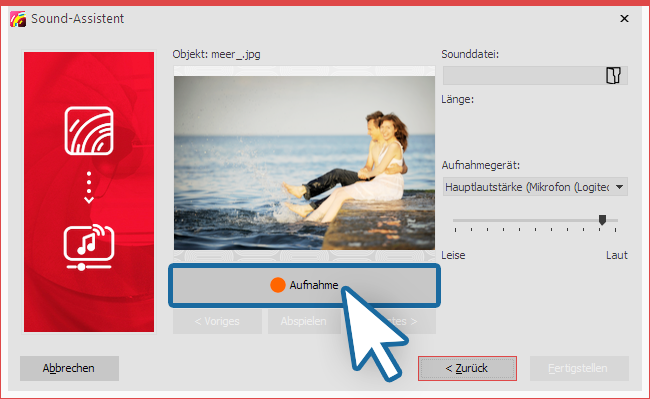 Record comment 3 Comment on single images Click Record and record the comment for the displayed image. If you misspeak, stop recording for the image and start again. You only need to speak the recording for the selected image again. Under Sound file you can open an already existing file. Under Recording device you select the microphone with which you want to record. Use the volume control to influence the recording volume. |
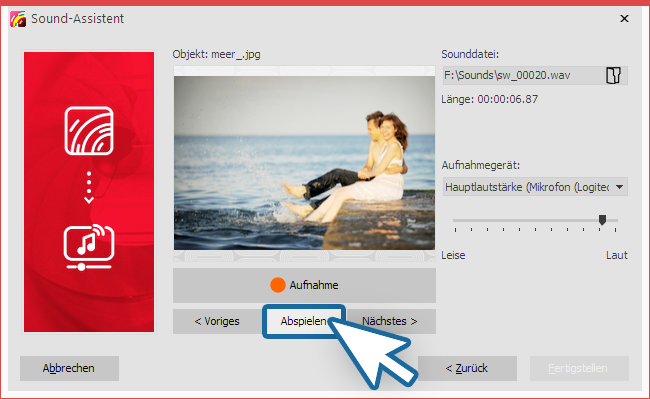 Listen to recorded comment 4 Listen to comment With Play you can listen to your recording. The Sound Wizard automatically assigns the recorded commentary to your images. The image display duration is automatically adjusted to the comment duration. Use the Next or Previous buttons to select the image for which you want to record a comment. |
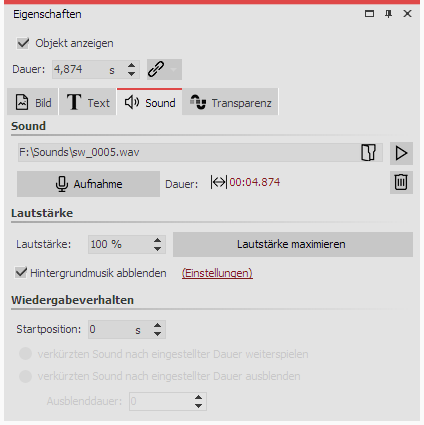 Sound in the image properties In the Object settings of the corresponding image you will find the recorded file. Via the Play button (triangle symbol), the recording can also be played back here. The Sound Wizard can also be started directly from the Object settings of an image. Click the Sound tab and select the Record button. The sound can be removed via the Trash can icon. More about the sound properties can be found in the chapter "Sound". |
|
In our series "Diashow mit Tonkommentar" you will find many tips on the correct recording technique, sources of error and the voice as a means of design. |