|
<< Click to Display Table of Contents >> Create 3D scenes |
  
|
|
<< Click to Display Table of Contents >> Create 3D scenes |
|
 3D scene The 3D Scene object gives you the option to arrange and animate images, texts and videos in 3D space in Stages. Within a 3D scene, objects are no longer defined based on their track order in the Timeline defined as background and foreground. Instead, each object can position and move freely in space and obscure lower lying objects or be obscured by objects further in front. This allows complex animations where objects switch between foreground and background during their display duration. This depth concealment exists only in a 3D scene. The degree to which the perspective distortion is visible in depth depends on the Vertical Opening Angle selected in the Project Settings. The 3D scene is used internally in the 3D Object Effects and in the Intelligent Template "3D - Floating pictures". |
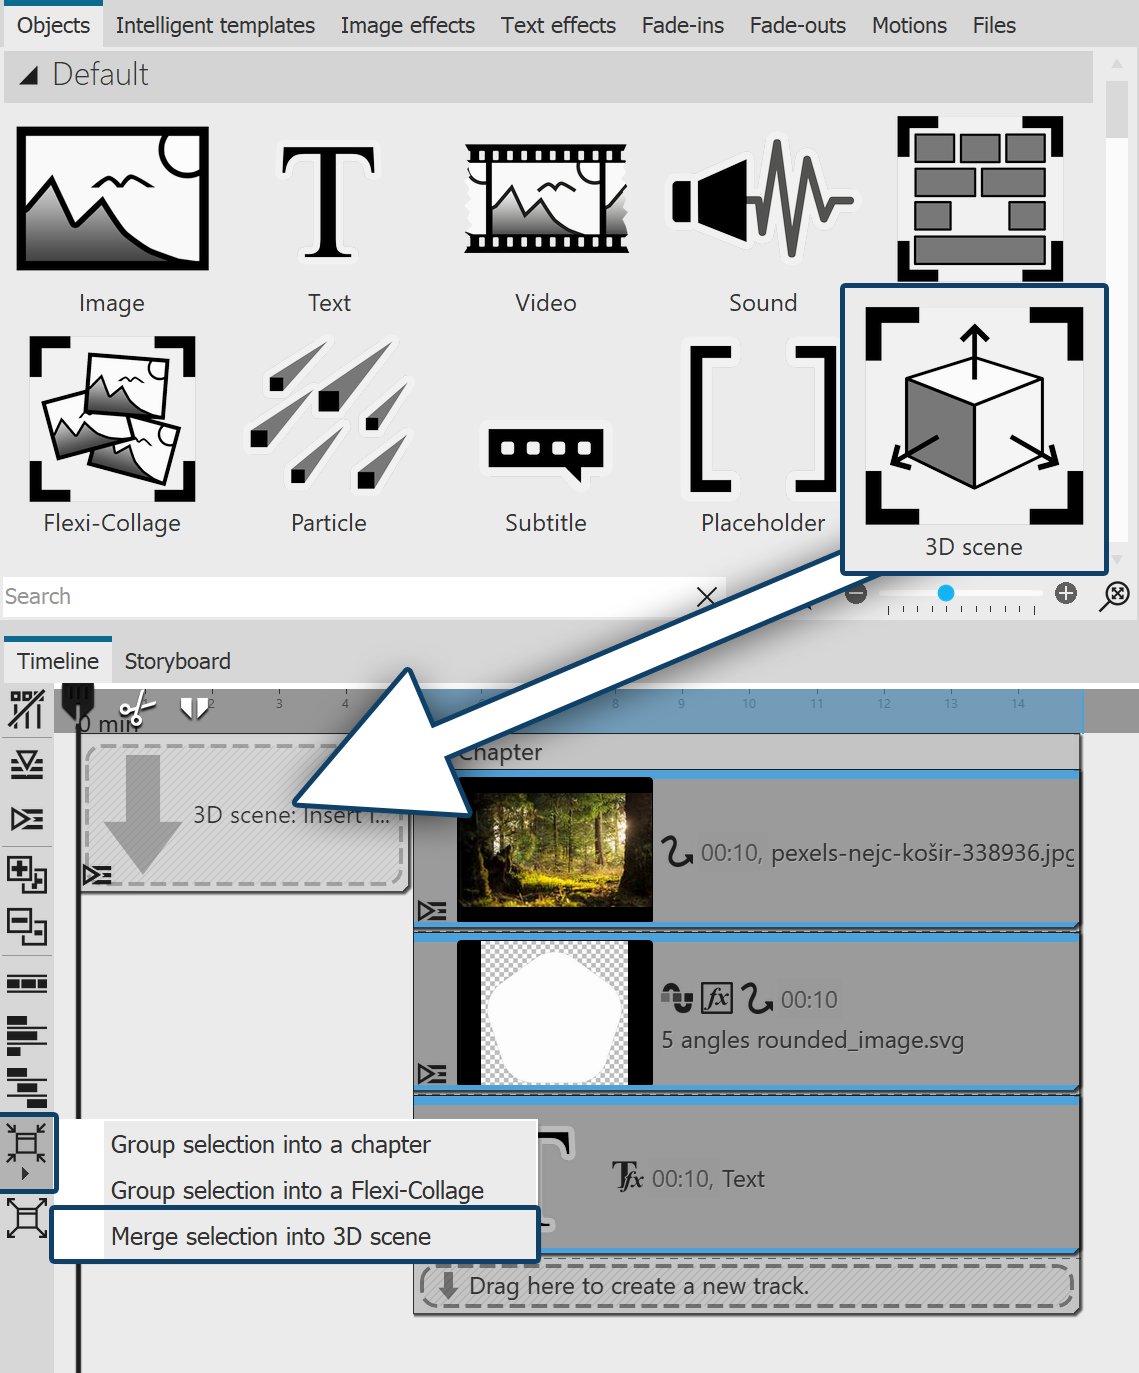 Stages Drag the 3D Scene object from the Toolbox to the Timeline. Fill the object with images, videos, or text objects. You can also select one or more objects in the Timeline and use the Merge icon on the left edge of the Timeline to merge the selection into 3D Scene. |
 Properties of the 3D scene 2 3D Scene Object SettingsSelect the 3D scene object in the Timeline to see its properties. The workspace for the 3D scene is determined by the project aspect ratio X:Y:Z. The value for Z is derived from the shorter side of the aspect ratio. However, the 3D scene can also have its own aspect ratio. To do this, select the setting Own for Aspect ratio. With the setting Automatic, the aspect ratio of the parent element (of another 3D scene or a Flexi collage) is adopted. In the Layout designer, as soon as you view an object within the 3D scene, the workspace is visualized by a bright area on the bottom. |
In the Timeline, select the object that you want to view or edit within the 3D scene. The Layout designer switches to the 3D view. The color of the surrounding 3D space is light or dark - depending on the selected theme.
Click the mouse in the checkered area of the Layout Designer. Use the mouse wheel to zoom in and out of the scene. To change the viewing angle on the object, drag horizontally or vertically across the checkered area while holding down the mouse button.
To restore the normal view, click the magnifying glass at the bottom right of the Layout designer.
 Format-filling image in 3D scene The position of the image in 3D space results from the X, Y and Z coordinates. For this purpose, rotation on the X, Y and Z axes (as well as combinations) is possible . In the 3D space, the position X=50 / Y=50 / Z=50 is displayed with red marking lines. To change the values for position, rotation or object size directly by numerical input, open the Manual input. You can also change the size, position and rotation of the object directly in the layout designer. The following icons are available at the top left of the Layout Designer for this purpose:
Select the mode and then click on the object whose 3D properties are to be changed. Use the X/Y/Z handles to implement the respective change or move the object directly with the mouse. For resizing, you can also use the colored handles on the dashed selection frame of the object. |
In the Layout designer or when playing in full-screen mode, you always see the center of your 3D scene from the front. How distorted a rotated or tilted object appears in a 3D scene depends on the viewer's distance. Imagine looking at the corner of a house. If you stand with your nose directly at the house, you will see little of the front and side of the house. If you stand far away from the corner of the house, you will see all the windows and doors on the front and side.
The following illustration shows the influence of the Project settings Vertical opening angle.
The photo within the 3D scene has the identical size and position in both examples (X=50% / Y=50% / Z=50%). The 3D scene is rotated 45 degrees on the Y axis.
On the left side of the image you see an opening angle of 35°, on the right side 48.89°. The opening angle is marked in blue.
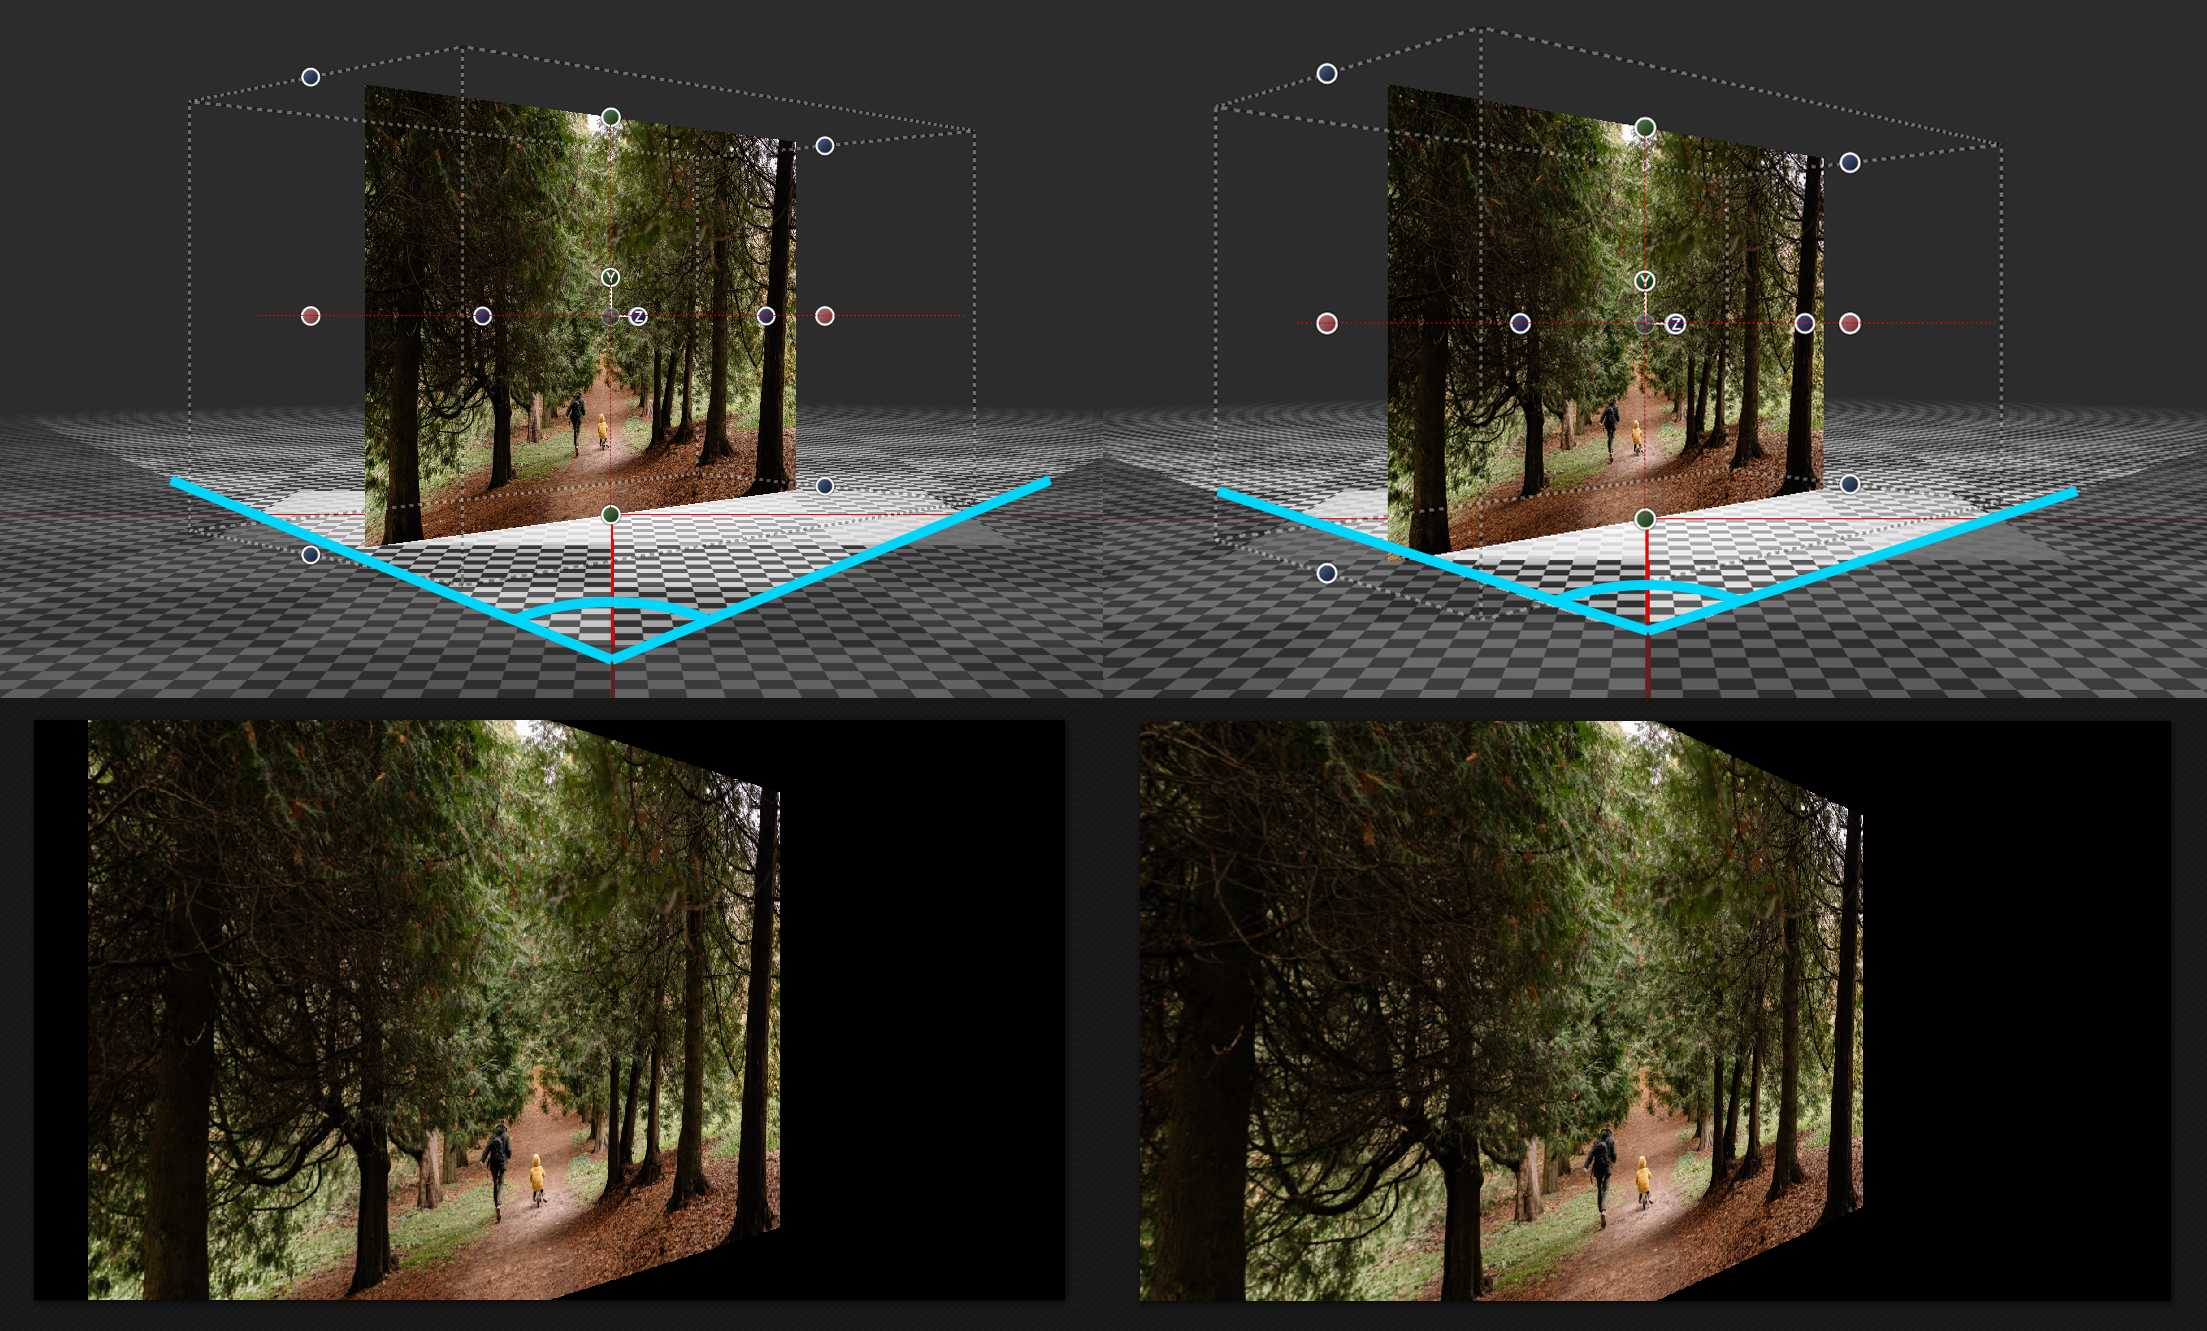
When played back in the Layout designer, you can see the differences in perspective distortion and the resulting visible image detail.